Showing posts with label applique. Show all posts

Saturday, 28 January 2012

needle turned applique

I know I said I was taking a break from blogging but I guess it's more a break from daily blogging!

A couple of people have expressed interest in seeing my practice pieces after I mentioned them in comments on their blogs and if I don't post about them now I probably never will.

It is summer in Australia (although here in Sydney you would hardly know it). Children return to school on Monday after their summer break. A new academic year starts for them and so I thought it would be good to start the year with something new in my sewing class too.

I have been very inspired by both the Mary Lou Weidman books I was given for Christmas so I decided I needed to learn needle turn appliqué.

I can already do fused appliqué with blanket stitch (by hand and machine) but hiding those raw edges was a complete mystery to me.

So my teacher showed me three different ways to do it by hand.

The first way involves ironing freezer paper to the right side of the fabric and turning the edges under using the freezer paper as a guide.

The second way involves drawing or tracing the shape directly onto the front of the fabric, cutting a scant 1/4 inch seam allowance, and turning the edge under as you sew it to the background.

The third way involves ironing the freezer paper to the wrong side of the fabric, tacking through the fabric and paper, sewing it to the background and cutting a hole through the backing fabric to remove the freezer paper.

I have done all of the above methods in the same background and labelled them in pencil.

At home I did two shapes by the second method. Both were drawn free hand and are a bit whimsical but it was the practice I was after, not perfection.

Next Monday I will lean how to work with inner curves and points and then I'll be ready to tackle a project. I already have one in mind but that's a whole new post.

And I'd like to learn how to do needle turn appliqué by machine too!

Sunday, 23 October 2011

Scrappy Saturday on Sunday

It is early afternoon here in Sydney, Australia, but it's still Saturday in USA so I'm not too late. Angela, of So Scrappy blog, lives in USA. All year she has been running a Rainbow Scrap challenge and all year I've been watching others use their scraps. Today I realised that I have started a block with scraps of orange so "better late than never" - I've decided to join in!

There's still another Saturday in October so perhaps I will get the block finished before then. But here is my beginning - an orange heart from the fabric left from my Country Houses quilt, cut with my Accuquilt Go Baby! and fused onto a piece of white homespun. I plan to blanket stitch around the heart by hand then make an orange border for this piece, which currently measures 5 1/2 inches square.

Tuesday, 2 August 2011

Small New Blogs Meet-up

Small New Blog Meet-UpThis is far from being a new blog since I have just written my 500th post.

But I do qualify for the "meet up" - I have less than twenty followers.

I would like to meet some new blogging friends so have decided to join the fun.

The creator of this meet-up, Lynne (what a great name! LOL), from Lily's Quilts, has asked that I start by introducing myself and my quilting.

Warning: it's a long introduction and current followers have probably heard it all before!

My name is Lynne. I have been married thirty four years this year. WM ("Wonderful Man") and I live in the metropolitan area of Sydney, NSW, Australia. We have one child, a daughter (DD), who was married in January 2009. She has two sons, one nearly eighteen months old, the other just five weeks old. In this blog I refer to them as Older Grandson (OG) and Younger Grandson (YG).

I have been knitting (on and off) since I was about five years old. I completed my first garment when I was sixteen - a sleeveless sweater with cables on the body and stripes around the lower band and arm holes. I became a serious, every day knitter, some time about 2006 and started this blog in relation to my hobby (hence the title).

My grandmother, who had her own business as an upholsterer/decorator, bought my first sewing machine when I was seventeen. She also taught me to sew because the high school I attended, despite being girls only, did not teach Home Economics! My first garment was a four-gore skirt in floral patterned voile which Nanna made me line for reasons of modesty! I loved that skirt and wore it for many years.

After I was married and working full time, I took "garment assembly" classes one evening a week for four years at the local technical college; so I have been sewing, on and off, for over thirty years.

In March 2010, when OG was just three weeks old, DD and I attended a craft fair. One of the sewing machine companies was running a hands-on workshop, making blocks that were to be turned into quilts for Haiti. DD and I both made one block each and, after a hiatus from sewing for many years, I remembered how much I enjoy the process.

So, DD and I went to our local Big Box Craft Store and bought fabric to make a quilt for OG to lie on the floor - it would keep him warm and protect our beige carpet from baby "spills". We didn't know what we were doing so we followed what we had done at the Craft Fair and chose seven coordinating fabrics. We didn't know how much to buy (I was overwhelmed by too much choice and was therefore not thinking clearly) - one fat quarter didn't seem like enough, so we bought four fat quarters of each!

We made one very wonky quilt. At that time, DD christened us the "Hacky Packy Quilters" (she loves alpacas).
finished size - 30" x 30"
As you can imagine, we had a lot of fabric left. Then we found the Modern Sampler quiltalong on Elizabeth Hartman's blog, Oh Fransson! We needed twelve fabrics so we supplemented the seven with another five. We made thirty of the thirty-six blocks, and ended up leaving five of those blocks out of the quilt because we just couldn't make them work.
finished quilt was 50" x 50"
We ended up using them in a laundry bag instead.

the fifth block is on the other side of the bag
We still have a small amount of those fabrics left but they will get used in scrappy quilts (eventually). This year in March we attended another Craft Fair and met a wonderful lady called Elizabeth, owner of Aussie Patches. Her warehouse,where she holds monthly "Sit and Sew" classes, is an hour and a half's drive from here. We attended three "Sit and Sew" sessions (April - June) but because DD's second baby was due in July we had to stop attending.

While there, I designed and began my Country Houses (applique) quilt. Now I am attending weekly classes in my local area and am finally at the stage of joining the quilted blocks together. I have a few quilts on my "to do" list when this one is finished, plus some other sewing projects.

one block of fifteen - unfinished size of each block 17" square

I look forward to meeting many new bloggers - please feel free to leave a comment; like most bloggers, I love receiving them.

And, if you haven't voted on my 500th post yet, would you please pop over there and vote - it's all for a good cause (or three). Voting will remain open until 8am (Sydney time) Saturday 6th August. Thanks heaps.

Friday, 29 July 2011

playing with sharp objects

The other day I was sewing the ends of my quilting into the layers of the quilt (sorry, C. but I like it that way) and stabbed myself in the right thumb with my sewing needle (I'm left handed).

I looked around me and realised just how many sharp objects are part of my everyday life. Apart from the needle I had in my hand, in front of me was my sewing machine which also has an extremely sharp and potentially dangerous needle, given the speed at which it can move.

To the right of my sewing machine, my tool box contained long, flat, quilting pins and a container of round headed pins; as well as spare needles for the sewing machine, a pair of very sharp (and pointy) dressmaking scissors, my rotary cutter and a spare blade.

To my left was a pin cushion which is used to hold that one solitary sewing needle when I'm not actually using it, a container of sewing needles, a small pair of stork-shaped embroidery scissors, my stitch ripper and a broken (and therefore sharp) plastic-and-wire needle threader.

The quilting block I was holding also held several curved safety pins which I use to baste my quilts and on my desk was the container of about four hundred open safety pins (my teacher told me to leave them open rather than closing them after use and opening them again when I need to use them).

On the other side of the room, on the back of my cutting table, is my recently acquired Accuquilt Go Baby die cutter in its very own sleeping bag. Not an essential piece of quilting equipment, and certainly not used every day, but the dies are nonetheless sharp. In a drawer underneath, is DD's right-handed rotary cutter.

After dinner, which I ate with a knife and fork (both having sharp parts), I went to the living room to work on the Pinwheel Blanket. On the floor beside my chair was a set of Knitpicks nickel plated tips on a sixty centimetre (24") cord - they are pretty sharp, much sharper than the Harmony wooden needles. Nearby lay another pincushion, this one holding the tapestry needle that I use for sewing up my knitting and several straight safety pins. There was also a usable but broken (and therefore sharp) all-metal yarn threader, a pair of suture scissors (at least that's what my sister-in-law, a midwife, tells me they are), a pair of 2.75mm dpns that I used to graft pieces together, one 2.75mm straight needle and one 3mm straight needle (which I used to graft larger pieces together) and a packet of crochet hooks in various sizes from 2mm - 5mm.

I am very grateful for the person (or persons) who realised that sharp objects make our lives a lot easier!

Tuesday, 26 July 2011

quilting not finished!

I don't have time to write a long post today.

Yesterday I went to my quilting class, ready to join my quilted blocks.

The teacher said, "You need to quilt (in the ditch) around the frame. I'm sorry; I thought I told you that."

She then showed me how to join two blocks together so that I can work on my quilt at home.

So, that's it, friends; the sun is shining for the first time in ages and I have loads of washing to do

...and I have to quilt those fifteen blocks!

Saturday, 23 July 2011

Country Houses quilt update

I have finally finished quilting each of the fifteen blocks for this quilt.

that shadow around the house is caused by the quilting line
close up of quilting 1/4" from the applique house

They are now laid out on the design wall (aka the living room floor) awaiting WM's and my "approval".


On Monday my teacher will show me how to join the quilted blocks together.

I started this quilt with one teacher who advised me to make the blocks 12" square. I made fifteen blocks, giving me a layout of 3 x 5 or a finished size of approximately 48" by 72" (with sashing, border and binding).

But then I changed to another teacher and in the process decided to make it by the "quilt as you go" method. Because the appliqued houses were only one inch from the sides of the block, my new teacher suggested putting sashing around each block to give me room to quilt - now they are seventeen inches square!

So, I hope the quilt shrinks in the process of joining the blocks - it is enormous! That means a fair bit of it will be hidden down the sides of the bed! *sigh*

Ah well, it'll be nice for the Grandbubbies to snuggle under, even if it is too big for the intended bed!

I live and learn!

Tuesday, 19 July 2011

don't look around - you'll be overwhelmed

Well, you may not be - but I'm beginning to feel like I'm drowning in UFOs - again!

I'm generally very focused. I don't mind taking on the big crafting projects - knitted blankets, bed sized quilts.

But, when I'm learning a new craft, I get very excited. I want it all - right now!

On 4th June I went to a quilting workshop intent on learning as many ways to make half square triangles (HST) as possible. I got really excited about HSTs - for a few days!

9" block - one of two - destined to be a drawstring bag
Then I saw a blog with a disappearing four patch block. I really wanted to give that a go. I waited. I forced myself to focus on HST. But eventually I caved and I made one!

8" block - probably destined to be a drawstring bag
Yes, that's it! Just one 8 inch block. And I was ready for the next thing!!

A friend suggested I'd better make sampler quilts rather than confine myself to the same block over and over - and I think she's right!

I don't have a short attention span. I can focus on the same knitting project for weeks on end. But I have been knitting for forty plus years and I've tried most of it! I won't say I've done it all but, well, I've done a lot. There is rarely anything that excites me to think, "I must try it right now"!

Patchwork/Applique/Piecing/Quilting has a different excitement. It's new. It's untried. It's unknown. And I want to do it all. Now. If not sooner.

I can be very disciplined. Yesterday I got a new toy. I unpacked it and took photos to show you. WM and I cut a single shape with it and then I put it away - for later!


When I have finished some of these UFOs (in order of how long they've been hanging around):

I don't know what I'm doing with this. It started life as a scarf but I felt the fabric was too dense for a scarf. Then I thought it would be a bib for forthcoming Grandbubby the First (who's now seventeen months old). It's acrylic and non-absorbent - no good for a bib. I'm thinking I might use the ends for a scarf and knit garter stitch between but I'm not entirely convinced. Any suggestions? (Rip it?)
After attending a knitting workshop with Liz Gemmell last month, I have found a way to deal with all the ends of this blanket so it will get finished - one day; right now it's not a priority!  
Second Sock/Mitten Syndrome is alive and well.
Ambassador of Love mitten - waiting for a mate!
This sock was finished but the cast (bind) off was too tight and I put it in the naughty corner in late April - it's still there!
toe up sock for WM - also waiting for a mate
I would block this shawlette - if I could figure out how! It's not flat; the centre is flat and then it ruffles! Hard to explain, even harder to photograph!
waiting to be blocked
Eight out of fifteen of these blocks were completely quilted until I got sick last week and couldn't focus to sew straight!

Country Houses twin bed quilt
I ran out of red yarn (136 stitches from the end of the last block). WM went to the Big Box Store but it seems they are not carrying that colourway anymore! I have to redesign my blanket to work with the colours I have.
Pinwheel Blanket
This fabric was bought to make two change mats for Older Grandson and drawstring bags for Angels for the Forgotten - once again, I was too sick last week to sew straight!
flannel fabric
This blanket is the thing getting my attention at the moment - the weather has been cold and I have had a cold; these two things combined mean my favourite activity has been knitting, curled up under a rug, in front of the television. This is coming together very quickly - despite me not feeling the love for the combination of yarn and stitch pattern!
Feather and Fan Angel Blanket

I did warn you not to look!! LOL

Thursday, 7 July 2011

Country Houses "quilt as you go" blocks progress

Last Thursday, I finished putting the sashing on my Country Houses quilt blocks ready for class on Monday.

In class, Jan and I muddled our way through one block!

the first block quilted - that shiny "line" on the left is a pin
Well, let's be honest. There was talking and eating of chocolate biscuits (dark chocolate mint Tim Tams to be precise).

There was also some preparation for quilting - like determining how much batting I needed and purchasing said batting (wool/polyester) and measuring the batting and cutting the batting (with scissors) and folding the uncut batting (to be used later at home); followed by the pressing of the inaugural "quilt as you go" block.

Then there was the making of a sandwich (no, not more food) involving clearing a space and tearing of masking tape and checking the fabric was taut enough and adding the batting and the quilt top and opening of curved safety pins and pinning and closing of safety pins (with the intriguing addition of a soup spoon handle as a safety tool) and finally the removal of masking tape.

Then, because my "getting to know your machine" class is not until the 20th July, another student (who has the same model of machine) showed me how to attach the "Upper Feed Mechanism" which is the substitute for a walking foot on the 6600.

Upper Feed Mechanism
 There was consultation with the owner's manual.

All this was followed by threading the machine and the needle (fortunately the bobbin was already wound) and determining just how the block would be quilted.

quilting one quarter of an inch from the applique
Take a deep breath (or two, or six, or twenty) - what the heck, Lynne: it's only stitches, it can be ripped out! And the first block was partially done; I had quilted the green stitching, I still had to do the beige around the windows and door; I ended up doing this at home.

quilting around the window (in the ditch)
Yesterday, I quilted the windows and doors of three more blocks - all in different colours, of course!

one window quilted - a view from the back
I have three more blocks to do the windows and doors on, then I can put green thread back on the top thread and finish the quilting on the six blocks that have been turned into sandwiches!

Alas, I have run out of safety pins and am waiting for a mail order which I paid for yesterday. Then I can do the other eight blocks!!

Are you all still with me or have you dropped from sheer exhaustion? ;-)

And now, look at the back of this block: does this look familiar to you (a lot like my knitted squares perhaps)? I still have to tie off the ends then hide them neatly inside the quilting sandwich! I've done half of them in the block in this photo!
threads to be sewn in!
Yes, Jan has automatic thread lock and automatic cutting of thread but it only works at the end of the "seam". One has to do reverse stitch or stitch in one spot to lock the beginning of the thread and one would still have to sew in the ends anyway! I'm sure after I've taken my "getting to know your machine" class, I will have a better way to do this!

We're getting there - Jan and I!

Sunday, 5 June 2011

Down Patchwork Lane

I have signed up for weekly quilting classes in my local area. I have had two classes at Down Patchwork Lane. It's amazing to me how little I get done in three hours! I know I am a slow worker but really, the output is almost non existent!

The first week I managed to applique around one house and add the top and bottom parts of the frame. Of course, I realise there's more to it - there's winding the bobbin and threading the machine and doing a test run of the applique stitch and pressing and measuring and cutting and talking to the teacher - but there isn't much to see for the effort expended! I didn't take any photos - what was there to show you?

The second week, I showed the finished quilt that DD and I had made and discussed its shortcomings with the teacher (apparently we didn't pull the top tight enough before we pinned it).

Then, I pressed and cut and unpicked several times and finally finished the frame of the first block


This is what the back looks like!

and then  I wound a bobbin and threaded the machine and talked to other class members and the teacher and started the applique on the second block and unpicked some more


At home, I finished the applique on the second block and managed to applique three more of the houses (with more unpicking and bobbin winding and threading of the machine) before I realised that I had done all that machine 'embroidery' without use of the "stitch and tear" stabiliser I had bought just for the purpose!


But that is not the reason why I stopped! Yet again, I have to unpick that pseudo-blanket stitch (it's really blind hemming stitch because DD's machine doesn't have blanket stitch and I didn't want to use zigzag or satin stitch) and that's really difficult when the stitches are a fraction of a millimetre apart!

Delighted Hands, I am even more in awe of your daily output!

Wednesday, 25 May 2011

Applique Adventures in Knitterland
eight more blocks started

ETA: This post was scheduled to be published at 8:09 this morning (I wrote it at 1:15am) - I don't know why it wasn't published!
~~~~~~~~~~~~~~~~~~~~~~~~~~~~~~~~~~~~~


It's amazing how much work goes into the simplest of products, like making these eight (incomplete)blocks.


I know many who read here are quilters but please, bear with me as I walk you through my process.
  1. Go to a store with thousands of bolts of fabric and choose ONE! Make sure it's one of the most expensive lines of fabric they carry! LOL
  2. Take the fabric home and admire your choice for a few hours (or days).
  3. Go to the laundry and press the fabric, being sure not to distort it!
  4. Return to the studio at the other end of the house. Fold the fabric in half; make sure the grain is straight!
  5. Cut three twelve and half inch strips from the 44 inch wide fabric. Don't forget: measure twice, cut once.
  6. Cut three twelve and half inch squares from the first strip and repeat for the second. Cut only two squares from the third strip.
  7. Choose eight checked fabrics for the houses and eight coordinating fabrics for the roofs. Keep in mind the fabric combinations already used on the first seven blocks (one shown here, the other six here) and don't repeat them.
  8. Iron the fusible webbing onto the wrong side of the house and roof fabrics (don't ask me why I needed to emphasise that!).
  9. Return to the studio and cut the houses and roofs from the fabric using a rotary cutter.
  10. Fold the remaining fabric and put it in a neat pile on the side of the cutting table, throw the usable scraps (bigger than 1 1/2 inches) in the scrap basket two metres (6 1/2 feet) away and the unusable scraps in the scrap bucket.
  11. Return to the laundry, taking the blocks, the pieces of "houses" and "roofs" and a twelve inch quilting ruler with you.
  12. Press a block, let the fabric cool, place the ruler three and a quarter inches from the bottom of the block, peel off the paper backing of one of the house fabrics, place the fabric one and three-quarter inches from the left edge of the block along the top edge of the ruler.
  13. Check all measurements at least twice.
  14. Remove the ruler without disturbing the fabric, press the house onto the block.
  15. Remove the paper backing from the coordinating roof, position it carefully so that the fabric just overlaps the fabric at the top of the house. Press into place.
  16. Repeat steps 12-15 for the other seven blocks.
And that's how to fill in a couple of hours and get some exercise while enjoying one's crafting time!

Saturday, 21 May 2011

Applique Adventures in Knitterland
a visit to Hobby Sew

Firstly, thank you for your comments regarding my dilemma with not having enough fabric to make the blocks for my Houses quilt.

I went to Hobby Sew in Kings Park on Thursday after work. Hobby Sew has an extensive range of fabrics and, more importantly, they have staff that know what they are talking about and give excellent customer service. Imagine, a large store that actually greets you on entry!

Before going to Hobby Sew, I had considered all my options regarding my Houses quilt and decided to purchase more fabric in a lighter colour. At first I looked at lemons - but I didn't like the green and gold theme (don't get me wrong, I love Australia; I just didn't want that combination for this quilt). I tried creams - better, but still not quite right.

Then I found a beautiful, subtly patterned, green fabric. It was expensive.

I tried to ignore it. I looked at other fabrics. But in the end, it was just. so. right. and I had to buy it.

I have tried to photograph it but cannot convey the way the pattern shifts from light to dark, how the dots randomly form little flowers and yet, from a distance, the fabric looks solid. This is the best I can do - photographed with the bottle green of the other blocks; don't they look good together?


And, for my applique, I bought these:


Thursday, 19 May 2011

applique adventures in knitterland
patched laundry bag

A long time ago, our laundry bag (which is only used when we go away) was caught on something and got torn.

On Saturday I decided to patch it! I know it's not perfect but it's just a laundry bag and, most importantly, I had fun playing around with applique.

house width = two inches
Are we seing a theme here?

Tuesday, 17 May 2011

my first ATCs

ATC = Artist Trading Card

I have long been interested in this form of miniature art. I think I was still teaching scrap-booking classes (around 2005) when I first heard of them. I have seen them made in paper, mixed media and fabrics but I've never seen a knitted one (now there's a challenge, Lynne!)

I have long wanted to make some but, for the past couple of years, my practical side has been getting in the way of making art of any kind. Craft is okay, my inner critic is silent if the article under creation is of practical use; but "art for art's sake": forget it!

Just about every time I have thought about making art during daylight hours, I have felt that it would be such a waste of time. Only in daylight hours, you ask?

At night, when I can't sleep or just before I fall asleep, I think of great ideas for all kinds of art projects. In the bright light of day, all my ideas float away like mist or just seem too silly or impractical.

But there are a few reasons why that changed on Saturday:
  1. My new studio - I just feel more creative with all that space around me (if I ignore all the boxes still in my old study screaming for me to sort through them).
  2. I have been quite ill with a heavy cold, including awful sinus pain and headaches. I didn't have the energy or enthusiasm to deal with boxes of stuff!
  3. My new-found interest in quilting; it means I have been looking at new blogs and one that has really been inspiring me is Kate's Arty Bits Blog. Kate has been making ATCs and she keeps inspiring me.
  4.  I want to be creative but I have come to a impasse with my latest quilt: I don't have either the fabric or the thread to go ahead and haven't felt well enough to go to a fabric store to change that situation.
  5. A simple decision - I decided that I was going to make an ATC and "Miss Critic" could take a hike. I know, from past experience, that once I'm in "the zone" I can't hear her anyway so I just had to get past that not-so-still-small-voice!

So, on to the actual art making...Who knew that something so small would actually take a couple of hours to make; if you count gathering supplies, making decisions, cutting, making more decisions, assembling, making more decisions, re-assembling, making more decisions, gluing, labelling and cleaning up!

So, you have already seen this - the beginnings of my first applique block:


Well, it seems I'm working on a series for the first time in my artistic life. Here is Saturday's version made from scraps of long finished scrapbook pages (I can't bear to throw away anything that might be useful, hence those boxes that need sorting!):


And I was taught never to mix patterns (see Miss Critic - you are not always right!)

Lesson learnt: Cut the background papers slightly too large and trim them back later!

And here is Sunday's softer, less 'realistic', version:


Verdict: I'm not 100% happy with what I've produced (what artist ever is?) but I've made a start and making art makes me happy so "Take that, Inner Critic!"

Monday, 16 May 2011

getting to know her Brother

On Friday, I woke with a gummed eye. I suspected conjunctivitis and asked WM to go to the chemist (drug-store) for some eye drops. However, it could just be an allergic reaction to all the wood-smoke pollution in the air. It is unseasonably cold and people all over the neighbourhood have been lighting fires. That would be okay but many of them seem to go year after year without getting their chimneys cleaned. Even with the house closed up tight, the smoke still gets in and irritates our eyes, noses and throats (which does not help the fact that we both have had very heavy colds this week; him since Sunday, me since Wednesday).


Well, that's enough of my ranting...

I spent Friday sitting inside in the intermittent sunshine of my new studio, getting to know DD's Brother sewing machine. As suggested by Elizabeth, our quilting tutor, I put every one of the stitches on the machine through its paces, varying both stitch length and width. Most of them are not meant to be decorative stitches, they have practical uses like "blind hemming", joining elastic, making scallops, or joining and finishing seams at the same time. Nevertheless, Brother got a workout and his side kick, Manual, was heavily used too. I now have a fair idea of what stitches I can use in a decorative way on the appliqué quilt I talked about here and here.

And, because I know you want pictures, here are some photos of my 'sampler', all carefully annotated!


Is this kind of stitching normally done with a heavier thread?

Saturday, 14 May 2011

Applique Adventures in Knitterland
more blocks started and a lesson learnt

On Tuesday I created six more blocks like the one I showed in Tuesday's post.


I am learning so much but one important lesson I learnt on Tuesday was never to let anyone, even the tutor, work out how much fabric I need. I am short of the bottle green background fabric for one block. I have several options:
  • email her and ask her to send me another 90" length of the fabric (it's the widest fabric I've ever seen)  for one 12 1/2 inch square. I don't know whether she would charge me for the fabric and the postage, or just the fabric.
  • piece together some of the left over fabric to make one block
  • buy a different fabric for the background of seven of the fifteen blocks
This last one is the option I am currently considering. Remember in my last post I thought that the bottle green might be a poor choice? It's very dark and I don't want the quilt to be dark and brooding - I want it to be fun. So, I'm thinking that a light coloured background would be a good way to lift the whole quilt (once again, comments appreciated).

Tuesday, 10 May 2011

Applique Adventures in Knitterland

On Saturday, DD and I attended the second of our "Sit and Sew" workshops. The teacher was impressed with our finished quilt (seen in this post) and with the progress we have made on Quilt #2 (seen in this post). However, she didn't want us to work on Quilt #2 as there was nothing new to be learned - to finish it we need only the skills we had learned in the first workshop.

Instead, Elizabeth strongly encouraged us to start a new project so that we could learn something new. We had brought some fabric and some batting to learn stippling (freeform quilting) but that was not enough to keep us busy for five hours! Here is my first atempt at stippling!

Both of us chose to do applique and, for the first time, are working on separate projects. DD was very brave. She has little sewing experience and chose to do a wall hanging of a geisha from a pre-packaged kit, I think by the end of the day she was beginning to question her wisdom! The picture has been taken from Aussie Patches website.


I had been thinking about naive colonial style houses for a couple of weeks as my first applique project: houses are made of all straight lines so it would not be too difficult. Elizabeth gave me some books from her reference library to look through but I already had a strong idea of what I wanted so she gave me some copy paper and left me to my own devices. Within a few minutes I had drawn my own design which I then scaled up to create a template for a twelve inch block.

What took the longest amount of time was selecting the fabrics I wanted to use from the limited range in Elizabeth's warehouse. The kind of fabrics she sells are mostly traditional florals or Asian fabrics, with some novelty prints - not really my thing at all (except for the Asian fabrics which, though lovely, were not right for the quilt I had in mind).
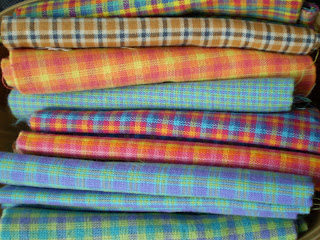
I ended up choosing a pack of semi-solids/tone-on-tones (20 x 7 1/2 x 10 inch pieces - the black in the bottom right is not fabric, it is the background of the photo)


and ten fat quarters of checked fabrics (plaids). DD keeps stirring me; I don't usually like checks and she thinks it's a great joke. But I am after a particular look and the checks are right for what I have in mind. The fabric I chose for the background is a dark bottle green (because Elizabeth didn't have any light coloured solids that I liked with my selection of checks). The dark green made the colours "pop" and looked good in theory but now I have begun my first block I wonder if I have made a mistake (constructive comments welcome - I'm on a steep learning curve here).


I think I will have to choose some bright thread for stitching around my applique. I also think the thread might need to be thicker than the standard Guterman sewing thread (again comments welcome). I don't want to buy a lot of different coloured threads - but I don't know what colour to use. Because at least two of the checked fabrics have yellow in them, I can't use yellow to add brightness as I planned to do.

So, the stippling, the designing, the drawing of my template, choosing fabrics, and a bit of tracing, cutting and ironing are all I did in the five hours I spent at the workshop. Choosing fabrics is always a slow process (I keep being distracted by fabrics that catch my eye but aren't relevant to the task in hand) but I don't think I got my money's worth out of this workshop.

Elizabeth, on the other hand, made a profit: not only did we pay to attend the workshop, but DD bought a kit, I bought over $100 worth of fabrics, fusible web and stabiliser for a single (twin) bed quilt. Plus we both booked in for the workshop in June; which will be our last, GB#2 is due early in July.

I am hoping to be able to find classes closer to home; driving alone for an hour and half in heavy traffic is no way to start a workshop - it stresses me out! Not to mention the hour and half to drive home when I am tired and the sun is in my eyes.