Showing posts with label class. Show all posts

Wednesday, 20 January 2016

EQ7 beginners' class

Not a lot of sewing has been going in in my sewing room in the past week. WM and I were away last weekend with four other couples from church. We spent Saturday having some "couple time" and ate our evening meals (Friday and Saturday) with the other couples. It was wonderful to have time together, knowing there would be no demands made on us all day!

Otherwise, most of the time spent in my sewing room has been in either practising keyboard (I'm being groomed to accompany the worship at prayer meetings) or cutting up yet more piles of scraps. There are no photos, I think you've seen enough photos of cut scraps for a while!

Today I attended a five hour beginner's class in the use of EQ7 (Electric Quilt). I had a wonderful time, learning the basics of how the program works and a little of what can be done with it.

At the end of the day, the teacher challenged us to each work from a different photo of a tiled floor and create a quilt.

I don't have the original photo to show you but here are my creations as they were modified.

The original photo was "on point" and was quite complicated. My original attempt makes for something interesting but not at all like the original.The colours are a bit too wishy-washy for my taste.
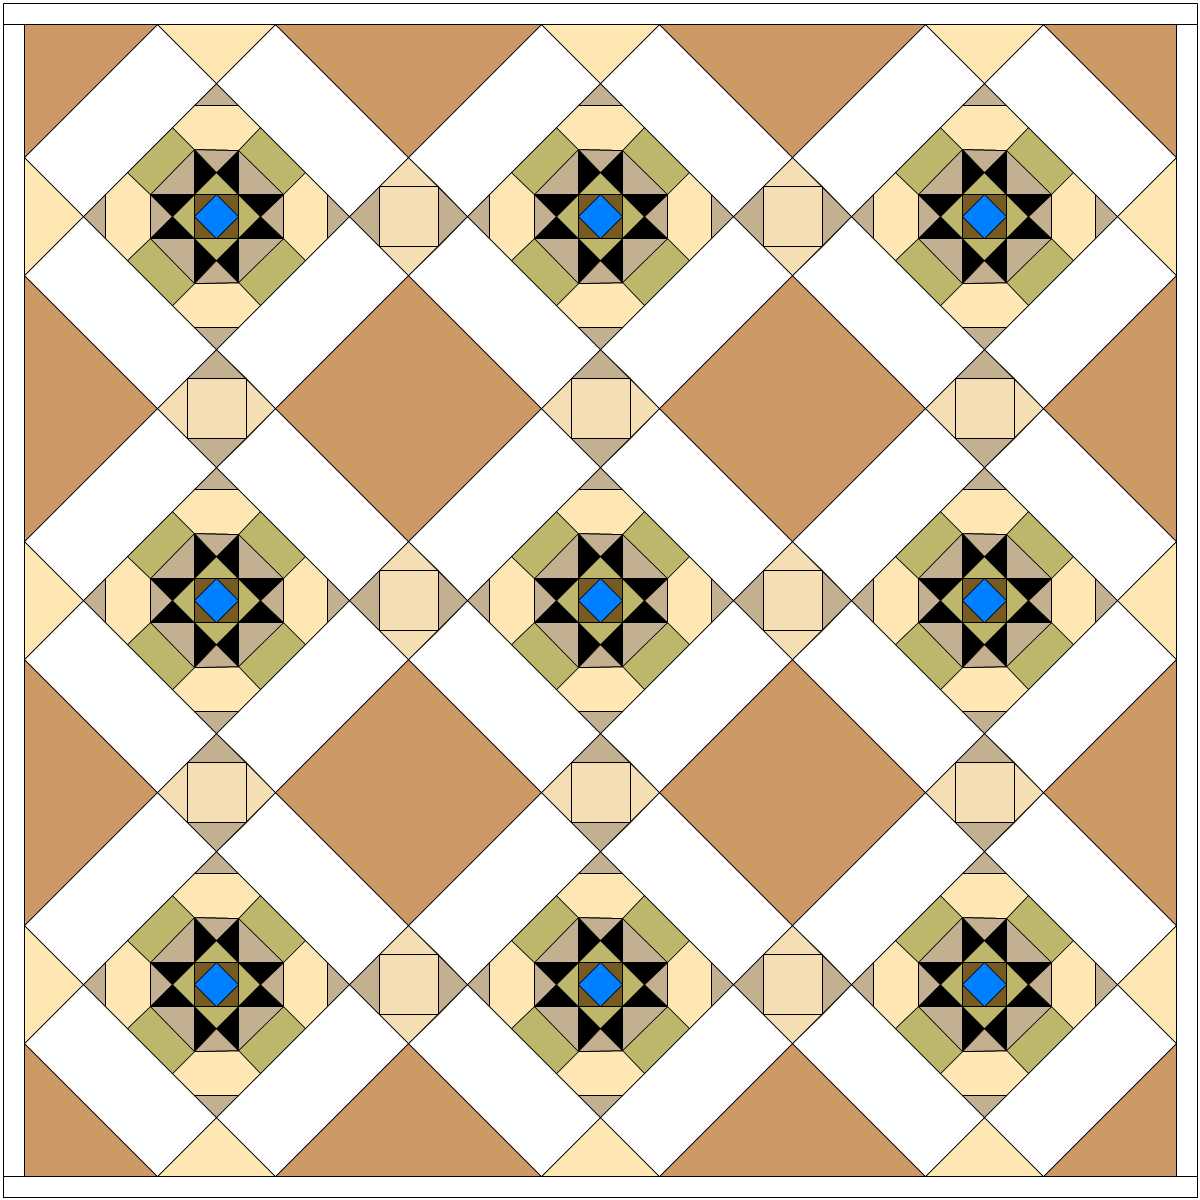

The second image is much more accurate as to the pattern of the tiles with my modification of the colours. This quilt, in EQ7 as it stands, would be 110" square -- way too big for any quilt I intend to make in the near future! The octagons should be more prominent than they are in this layout!


This third quilt is getting closer to something I like, but still using variations of the original colours. This would be a mini quilt; it's only 30" square!


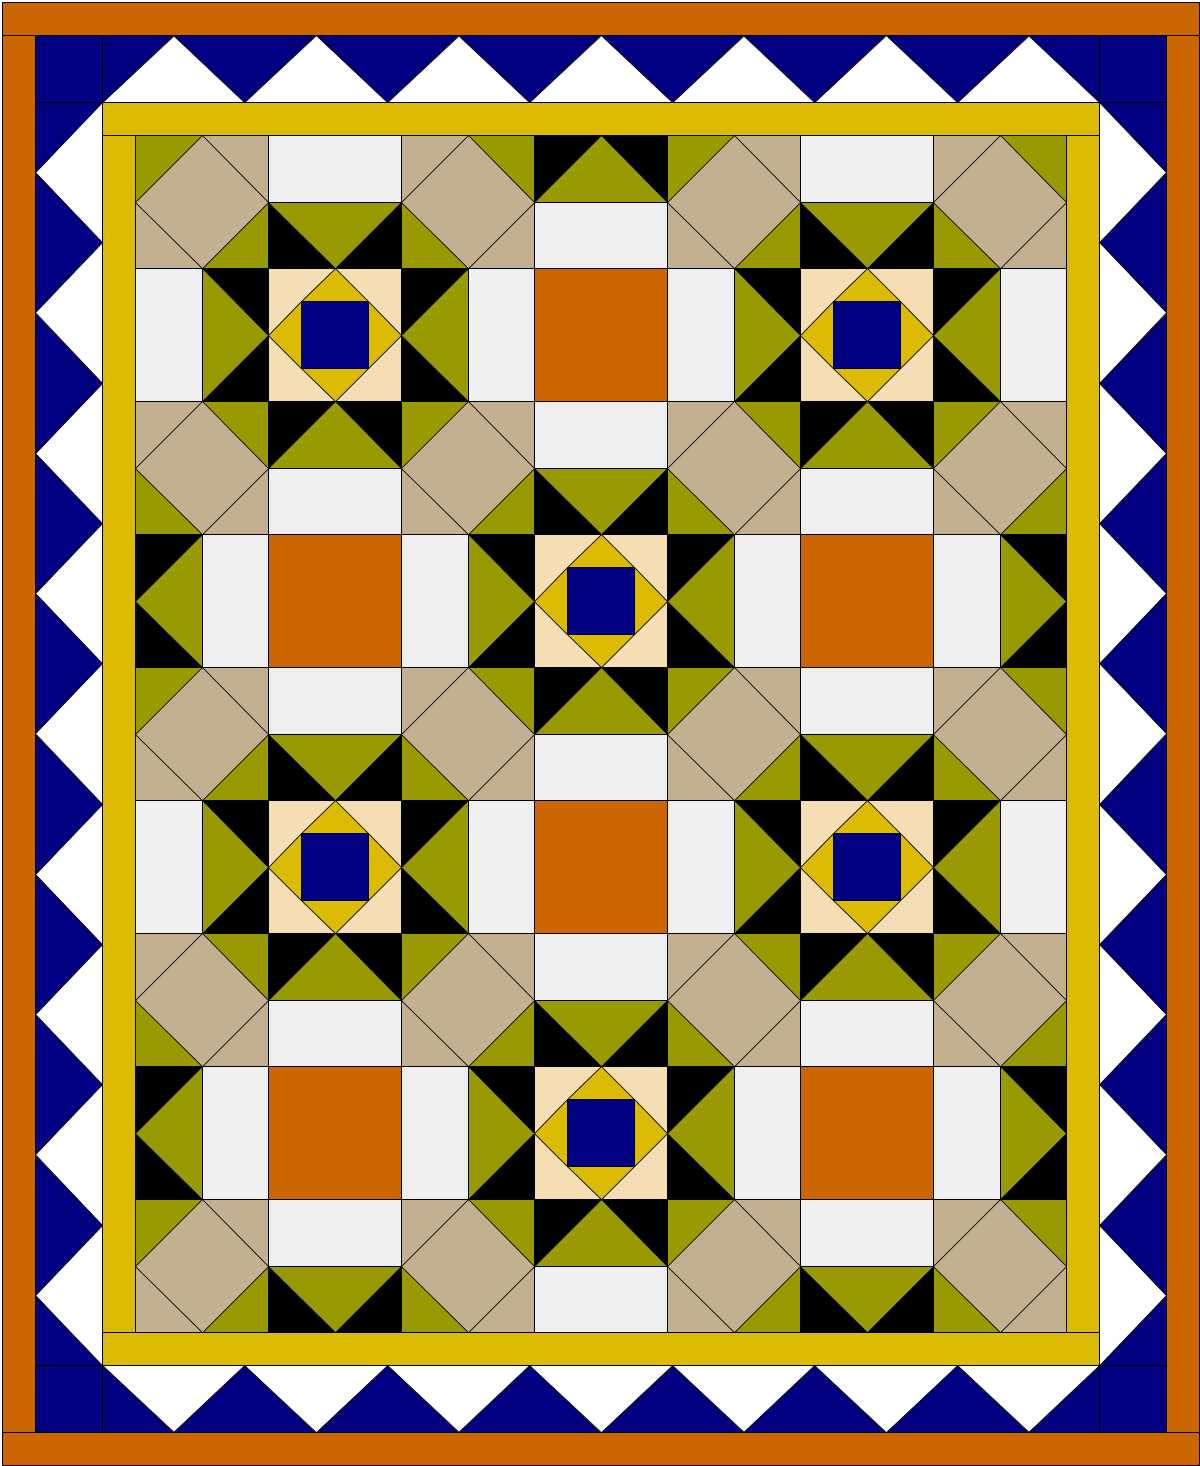
Finally, at home after dinner,  I came up with something I like and could use. I've changed the quilt to a size within the limits of our charity quilts (54" x 66") and changed the colours to something I think is much more appealing.

As I said, I loved the class and look forward to our "advanced" class in a few months time.

What have you been up to this week?


Tuesday, 2 September 2014

Something Old, Something New – September edition -- Redux

This post, which was published on 2 September, has been completely re-written. Friends have made relevant comments and there is a linky attached so I couldn't figure out how to write a whole new post. The original post, which has been slightly modified, has been posted as monthly check up and dated 31 August. Some of the comments refer to that post rather than this new one -- sorry, I just couldn't work out how best to proceed.

If you've come in from Angela's Rainbow Scrap Challenge, please follow this link for my green scrap related post! Sorry - I couldn't work out how to edit my entry over there!

Firstly, a big thank you to all my blog friends who reminded me that "Something Old, Something New" should be about just that -- not my whole master list! Thank you, too, for the reminder that nowhere have I said I have to get anything finished. I think I'm confusing myself with last year's linky party!

August was a messy month for me. I undertook a new leadership role in relation to music and that occupied pretty much the first week. Then DD and the boys arrived unexpectedly and stayed for a week because DD became too ill to drive home! Those germs were passed on to me, got into my sinuses and my head was so so stuffy for the next week I could barely do anything.

The last week of August saw me back in my sewing room and quite productive -- but not on the goals I'd set myself.

My 'old" project for August was a pair of curtains that I started making way back in 2011. DD is still vacillating as to whether she wants the curtains or not. I don't like making curtains particularly so I'm waiting for her to make a decision before I spend time on them! At the rate she's going, both boys will have outgrown the fabric and no decision will be needed! ;-)

My "new" project is always something new in the sense of technique or something I haven't made before. I had planned to start a quillow in August but, with all of the above happening, I missed two classes so it never got started. I’ve since decided that I don't really want to make one anyway!

So, in keeping with my original stated aims for "Something Old, Something New", instead of giving you my 'master list' for the month, I will stick with two things:

Something Old: work on Canary on a Pinwheel quilt – this should have been my Relaxing Robin challenge but I fell way behind! Moving house didn’t help! The photo shows it just as I left it in February

one block, first border 

Something New: start a rainbow "pioneer braid" quilt by learning how to make a  64”-70” braid from orange fabric (this month’s colour for the Rainbow Scrap Challenge) from the tutorials on two blogs: Stitchin’ Therapy and Quiltville Quips and Snips – I started this in class yesterday (by cutting 2.5” X 7” strips)
orange strips cut 


So, how did you do in August?
Was it too warm for crafting in your part of the world?
What are your plans for September?
Dare I ask if you are starting your Christmas crafting?

Link here with the URL of your specific blog post so we can all come visit.
We'd love to see how you're going and what your plans are for next month.

Saturday, 8 February 2014

scrap happy

Wow! What a busy week I’ve had. I’ve had at least one activity every day this week, which is most unusual. Next week is also busy with church tomorrow, three activities on Monday and two on Wednesday. Thank goodness I have a free day on Tuesday and on Thursday. There’s nothing in the calendar for Friday but it’s WM’s rostered day off, so who knows? I can’t remember when I was this busy!

However, you didn’t come here to talk about my calendar! You came to read about scraps.
I have been remiss in showing you what I have acquired over the last few months.

First there was a little package from Kate (Kate's quilting blog) in the UK.
 scraps from Kate 2
Then a fellow member of Caring Hearts Community Quilters gave me this little ziplock bag of scraps – all nicely ironed and sorted by size. I have been through the bag searching for pink scraps so it’s been a bit messed up since I received it.
  scraps from Virginia
Then another member of Caring Hearts Community Quilters gave me a large grocery bag of scraps – these are not ironed or sorted so the contents of the bag are a mystery to me!
 scraps from Margaret inside
The next few are not scraps but they have been donated to me in one form or other.

Firstly, I won these two fat quarters of batik fabrics on Lyndsey's blog, Sew Many Yarns. (I’ve just embarrassed myself and found the giveaway was February 2013. Sorry Lyndsey).
fat quarter batiks from Lindsey
One of my class-mates has been de-stashing – I acquired this lovely collection of fabrics on behalf of Caring Hearts Community Quilters. We have no room left in the fabric cupboard in our meeting room so those who receive donations of stash have to store them (or use them) until such time as space become available!
  scraps from Gail
This week, our founder arrived with several boxes and bags of fabric that were left on her doorstep last weekend. My fellow quilters decided I would like to add these fabrics to my Caring Hearts Community Quilters stash – they know I like working with bright colours!
 more brights from CHCQ
Despite my busy week, I found some time for playing with scraps. I pressed and cut these 3.5" tumbler “charms”:
   2014 pink tumblers
I’m still deciding on the final layout; this is not it. Whatever I end up with, this is the first of my scraps this year to be used in the Rainbow Scrap Challenge over at So Scrappy blog.

Speaking of the Rainbow Scrap Challenge; I used up the last sixteen 6” crumb blocks in a panel which will be part of the backing for my “Violet and Friends” quilt.
 V&F backing panel
So, although there hasn’t been time (until now – late Saturday afternoon) to take photos or write a blog post, I have had a little time to sew. It’s amazing what returning to class after a seven-week break does for one’s enthusiasm!

Linking up with the Rainbow Scrap Challenge.
Soscrppy

Sunday, 2 February 2014

Something Old, Something New – February edition

If you are visiting this challenge for the first time, welcome;
you can read more about the basic idea on this page
and/or you can click on the link to read the January edition.
Never too hot to Stitch!
Here we are in February. I don’t know about you but January just seemed to fly by. Summer holidays are over (although summer isn’t) – the kids are back in school and most of my activities start up again this week.
I didn’t achieve as much as I hoped during January; the reading bug bit and I spent more time reading than crafting.
One thing I’m already appreciating about the Something Old, Something New challenge is that, because there are only two "set" projects a month, it’s completely doable yet keeps me moving forward.
So, firstly a review of January’s goals:
For the “old” part of the challenge, I aimed to complete a flimsy from 48 crumb blocks I had made for the Rainbow Scrap Challenge in 2011 and 2012. In January, I wrote a post about my process; here’s the flimsy:
V&F finished flimsy
I love it! It turned out much better than it looked like it was going to. Working with other people’s scraps (as I often do) can be a big challenge but this one came together really well.
For the “new” part of Something Old, Something New, I decided to learn how to do shadow (aka illusion) knitting. This is a relatively easy technique which can have spectacular results.

My first attempt was less than spectacular and getting a good photo was more of a challenge than the actual knitting.

Here is what looks like a striped piece of knitting:
shadow knitting #1 stripes
and here is the checkerboard shadow/illusion
shadow knitting #1 revealed
 Pretty amazing, isn’t it?

However, it became very obvious to me when I was about halfway through this piece that smaller needles than usual were required to obtain a good result; otherwise  the areas of stocking stitch (stockinette) are too obvious and break up the illusion in the pattern.

I used 8ply (DK) weight yarn on 4mm needles. Since I have a very loose tension, I need to use smaller needles than that to get gauge at any time – why that didn’t occur to me before starting this sample I don’t know! I’m not teaching this workshop until July, so I have learned something to be sure to tell my students and I still have several months to improve my own technique!

Now, onto February’s challenge:

By the ‘rules’ I set for myself (you can create guidelines that work for you), my “old” project has to be something I have not worked on in more than three months.
on the bed - too big
I began my Country Houses quilt in 2011 and worked on it through the year.  I originally intended it for a single (twin) bed but it’s much too big for that so I’ve been trying to make it fit my queen size bed (which is where it was photographed and you can see it’s way too long and too narrow -- two rows have since been removed). It occurred to me recently that I could just turn it into a wall hanging and hang it opposite the front door. Now I’m not sure what I want to do with it but I know I want to get it out of my UFO pile!

Therefore my “old” project will be to take Country Houses at least to binding stage!

My “new” challenge will begin in the class I attend at my LQS: we decided last year that we would be working on the technique of foundation (paper) piecing. Because I have not done any, I have nothing to show you of my own but I’d like to try this block designed by my friend, Cindy, at Tops to Treasures. The link is to Cindy’s tutorial for making this block.
Paper Pieced Tree Image
So how about you?
Did you work on an old project in January and/or learn a new technique?
Do you have an old project you will be working on in February?
Will you be learning a new technique in your chosen craft or starting a new project?

Link here with the URL of your blog post so we can all visit and see how you went in January and what you have planned for February.

Tuesday, 27 August 2013

stitching with a machine

What's that? Oh yes, I’m procrastinating! I should be moving fabric back into the sewing room but this easier. But as soon as I’m done here, I’ll get to it!

I haven’t done any sewing at home in weeks but I have taken my sewing machine to class on the last two Mondays. That means I am back to working on my “Sampler Blocks”. It takes about three hours in class to complete one of these 12.5” blocks – that is: pressing, cutting, piecing, pressing, piecing, pressing, piecing, pressing. It sounds like a long time but in between there is chatting, consultation with the teacher, chatting, a cup of tea, chatting, goodies to eat, chatting, moving around a cramped classroom, chatting… well, you get the picture.

I’m not sure which, if any, of these blocks I have shown before so here are the five I have completed since (ahem) the beginning of the year. Of course I’ve been working on other things – a fair bit of hand piecing, making my project bag, basting and binding the Earth and Sky Quilt; to name a few. After all, how many of you work on only one project at a time? :-)

So here they are, in the order I made them (I think)

Domino
1 Domino
Oregon Trail
2 Oregon Trail
Cajun Spice
3 Cajun Spice
Pathways
4 Pathways
Blocks and Star
5 Blocks and Star
I think I’d like to see "Pathways" as a whole quilt.

Do you have a favourite?

Friday, 29 March 2013

Thank Goodness It’s Finished Friday

Today I’m hosting the linky party for TGIFF and, yes, I have a finish.

It’s not the one I hoped to have – although that came close.

This is an previously unpublished project.

A few weeks ago, my quilting teacher was talking to us about making a quilt each for the Gift of Hope project. Basically, the quilts are made and donated to families whose babies are still-born or die soon after death. My teacher says “born asleep”.

It’s a sad project but I wanted to help.

Here is a picture of the backing taped down ready for basting and the flimsy lying on top.
2013 #1 basted
I tried hard to buy some suitable green fabric for the binding.

I had plenty of the pink but felt it would overwhelm the whole thing. I didn't have enough of the white-on-white print to make binding and thought a slightly darker blue-green would be perfect. Of course, the colour in my head was not available.

At Caring Hearts Community Quilting group yesterday, someone found a white fabric with a tiny gold print on it that I could use.
2013 #1 binding fabric detail
So last night, I made binding and hand-stitched it down. But, of course, I had to wait for daylight to take photos!

First the backing – a hand dyed fabric donated to the quilting group (I also used this on the front).
2013 #1 backing
I quilting diagonally through the floral squares. This photo also gives the most accurate colour of the fabrics.
2013 #1 detail
Finished size - 24" x 24".
2013 #1 finished

Thank goodness I had a finish to show!

I'm also linking this project with Barbara's New FO party. Pop over to Cat Patches and see the projects that were started by other bloggers in March.
2013NewFO

What about you? Do you have a finish to show this week?

Tuesday, 26 March 2013

slow un-stitching Sunday

After the frustration and tears of Saturday, I took it a bit slower on Sunday. I kept being reminded of a saying my mother had when I was a child, “more haste, less speed”. I didn’t understand it then and, half a century later, I still don’t really understand it. I gather she wanted us to move quickly but…

Cambridge Dictionaries Online explains:
said to mean that if you try to do things too quickly, it will take you longer in the end
Apparently it’s a uniquely British saying, which makes sense since my mother was born and raised in Kentish Town, north London!

Anyway, I digress. Back to the quilt I showed you in yesterday’s post. The eagle-eyed among you would have noticed that the blocks should have alternated horizontally and vertically but the column I had just attached was identical to the one beside it!

Of course, the first step to fixing it was to rip out two 66” inch seams. That was slow going because real ripping (in which I just use the seam ripper to tear at the stitches) results in seams coming undone that I want to stay sewn. Even so, I had to sew a few seams back together before proceeding. I was tempted not to but I knew I would regret it.

The pictures show 66” of ripped out sashing and the offending blocks removed from the top.
64 inches of sashing removedone panel separated
Then came some pressing with my new Semco cordless iron (WM reckons I bought it because it’s purple but I’ve wanted a cordless iron for years. And this was really inexpensive. I will talk more about it in a later post).
2013 cordless iron
And lots of pinning (yes, I’ve learnt that lesson).
lots of pinning
And moderately slow stitching.
moderaely slow stitching
All of which resulted in a finished top which is now basted and is in the process of being quilted on my normal machine. {Yes, I know I have a quilting frame but the garage is still hot! Despite the fact that it’s autumn, the temperature is forecast to be over 32°C (90°F) every day this week! And the humidity… phew!}

I do my basting in class as much as possible. There is a big table which I can use which saves me crawling around on my hands and knees and ensures that the backing and top are pulled tight enough (I always have a problems with one or the other if I attempt to baste either on the floor or on my quilting frame). But the best part is my teacher and the store owner, sometimes even my class mates, jump in and help which gets the job done in record time and makes it much more fun!

Now the race is on – will I get it finished in time for a big reveal for Thank Goodness It’s Finished Friday (which I am hosting this week)? Or will I have something else to show? Is it possible that I will host and not have a finish?
Y’ all come back then to see!

Saturday, 22 December 2012

O Christmas Tree, O Christmas Tree, O Christmas Tree

Back in July, I began the first of three embroideries of Christmas trees.

I finished the third one a couple of weeks ago.

On Wednesday, the three of them were joined with sashing to make the front of a wall-hanging.

On Thursday, the wall-hanging was basted and minimally quilted (in the ditch). The binding was cut but I had trouble with joining the strips at 45°.

On Friday, I re-watched the explanatory video and tried again. The quilt was bound and the binding was sewn down between lunch and dinner time.
2012 Christmas tree wall hanging front
Then, the hanging sleeve was cut and sewn which meant another video (thank goodness for YouTube). The label was cut from a metre of fabric labels I bought in the post-Christmas 2011 sales for $1.00!

After dinner, the hanging sleeve and the label were attached.


All that’s left now is for WM to hang it opposite our front door as a warm greeting to all our visitors.

Nitty-Gritty (for those who care about such things)
size: 32” x 15”
fabric purchased from Spotlightembrodery thread: green (3346), red (304), gold (729), brown (898)
sewing thread: Gutermann white (5709) and charcoal (5902)
stitches: stem stitch, Colonial knot

O Christmas Tree! O Christmas Tree!
How richly God has decked thee!
O Christmas Tree! O Christmas Tree!
How richly God has decked thee!
Thou bidst us true and faithful be,
And trust in God unchangingly.
O Christmas Tree! O Christmas Tree!
How richly God has decked thee!"

Linking up with Thank Goodness it’s Finished Friday post over on Sew Well Maide (hosted by Karen).

Wednesday, 12 December 2012

12-12-12

Today is my uncle's 75th birthday -- a jubilee indeed and an auspicious date!

I don't believe in coincidences but I do have a little story to share:

I had an embroidery class this afternoon. I went early because we were sharing lunch -- it was our last class of the year. Being so close to Christmas and in the heart of a shopping area, it was very hard to find a parking space. I had to drive around for a while, then wait while a woman backed out of a space. Very. Slowly.

I parked my car in that space, it had a three hour limit so I glanced at the clock. You guessed it -- 12:12 on 12-12-12! I couldn't have done it if I'd planned it!

Friday, 28 September 2012

stitching with one needle

Looking over my last few blog posts, you would think that the only craft I pursued regularly was knitting and that my only other hobby has to do with my iPad!
 It is true that that I use my iPad a lot, every day in fact. Why buy one if not to use it? Winking smile

It is also true that it would be a rare day if I didn’t knit at some point – usually in the evening while watching television with WM.

I have a knitting deadline which is coming up fairly soon so I am knitting during the day. Technically my deadline is 20 October but I am aiming for 6 October, just one week away. For those who knit or hand-stitch, I am making a dark-coloured item so knitting this particular project under artificial light at night is not an option!

As explained in this post, sewing projects require much more preparation than knitting so when life gets hectic or I'm feeling overwhelmed, knitting is my choice of craft.

However, this post is not about knitting. It’s about works in progress that are being made with one needle.

My current class project is another bag. On Monday I completed the lining.
inside finished
I’m pleased with the inside although I don't think I’d make those saggy pleated pockets again. This bag won’t stand up by itself so I had to pin it to the lounge and hold it open while I took the photo! Smile

I am away at a conference all this long weekend, but next week I plan to make the outside of the bag and the handle, then on Monday 8 October I can put the two parts together in class.

At Caring Hearts Community Quilters yesterday, I completed one heart and started another.You'll have to look closely on the blue heart, the thread is a really good match! LOL
2012-9-27
It was a slow sewing day because we had lots of Show and Tell. More importantly, it was our founder’s 70th birthday so we had a party! Happy birthday, Margaret! Even more excitingly for me, DD was able to attend her first meeting because SIL had the day off and was able to look after the Grand-Boys!

I have prepared my next embroidery project and will get started on it next week (after conference). Because I used a blue marking pen on a white background, I can't show you my preparation. Here is a picture of the pattern sheet.
2012 Christmas tre #3 pattern
I have also started another bag project (or maybe two) with these, my first foray into English paper piecing (and includes some fussy cutting):
first 17
The hexagon with the pink coloured spots (top left) was tacked by WM – wouldn’t it be fun if we worked on a project together?

And now, even though I’d like to work on my hexies or my embroidery, I need to get back to that “dark” knitting project before the light completely fades with the incoming storm!

Come back on Sunday to see some real-honest-to-goodness machine piecing!

Tuesday, 24 July 2012

Sew What Monday (on Tuesday)

Carol, over at Fun Threads, writes a weekly post about what she’s working on and invites others to link up and share their works-in-progress. This week she has finished a quilt top based on a book called Goodnight Moon. (while you're over there, check out that beautiful rocking chair).

Since I got my iPad four weeks ago, I have done very little sewing. I spent about a week catching up with blogs and then started downloading books from my local library. I have read more books in the past month than I have read in a year. It has even inspired me to dig out my Kindle and read books I have stored on there too.

But I do attend classes on Mondays. Since the beginning of June I have been working on a bag made from a half jelly roll (that is, twenty 2 1/2 strips).
carcass after quilting
the bag as I took it to class yesterday
I know I am very slow. I find it hard to stitch straight lines and be accurate so I have my machine on the slowest speed possible to be as accurate as possible. Due to my family commitments and my revived love of reading in combination with spring-like weather last week (which caused me to sit outside in the warmth to read – far away from my cold sewing room), I haven’t been sewing between classes.

But, finally my bag is starting to come together. Yesterday I sewed the pockets to the front and back and started putting the bindings on the top of the bag.
adding the pockets and bindings
I had been doubting my choice of fabrics but am now beginning to see how it all comes together and I think it will all work out in the end.