In the nearly-four years I have been quilting, I have never followed a pattern.
I followed the instructions for making the blocks for my second quilt,
Modern Sampler quilt from Oh! Fransson (which has been updated since I downloaded my instructions) but only because I knew absolutely nothing about how to make a quilt - I'd never used a rotary cutter and ruler, I'd never pieced small pieces (accurately or otherwise), I'd never pressed seams in one direction (I did press seams when I made my own clothes and, to be fair, Elizabeth Hartman from Oh! Fransson presses her quilting seams open too)!

Yes, I said my second quilt. My first quilt, made with DD, was cut in strips with scissors and pressed as best as I knew how (somehow, probably through the internet, I found out the seams were pressed in the same direction). I still remember my exultation when the four big blocks we'd made came together in a perfect + in the centre. It was "squared off" by eye and guess work using the rotary cutter which I had finally purchased and a very wobbly 2.5" x 36" binding ruler! It was almost a year later before we found a teacher and we learned to make a quilt sandwich, quilt (in the ditch) and bind! The photo is of the finished top – I wasn’t aware I had no photo of the completed quilt!

I spent quite a lot of 2013 making sampler blocks in class -- I wanted to practise my accuracy and learn as many tricks as I could and that was one way to do it. But, you know what? I'm not really excited by sampler quilts and I think I've learnt just about all I can from these particular blocks. These are the first five; they are basically pieced nine-patch blocks.
So, back to my opening sentence. I have never used a pattern. In general, I don't even create my own design in advance, well not in the traditional sense of using pencil and paper, or even software (although I am a technology addict)! Instead I tend to "feel" my way through the quilt making process. Let me give you an example:
In 2011, inspired by Kate at Kate's Quilting (and other arty stuff), I joined in with the Rainbow Scrap Challenge (RSC, which still runs and is hosted by Angela on SoScrappy blog). I had finally accumulated enough scraps in my very short quilting life and was ready to participate. I had no idea what blocks to make. All I knew was I didn't want to make the same block over and over for twelve months or more! I had dabbled with using scraps ("crumbs") when making a change-table mat for Older Grandson from the left-overs of those first two quilts,
so I decided to make what I called "improv" blocks (hey, I was a new quilter and didn't know the terminology!). Every block would be different so there was no room for boredom! What I didn't realise is how long it would take to make one 6" block from all those tiny pieces (fourteen in this 6.5” block)!
Anyway, I eventually ended up with 99 blocks over a fourteen-month period (I made other blocks for the RSC along the way but they're not part of this story). Most of the blocks sat patiently waiting, first on a shelf where I could see them and and then in a drawer where I couldn't. The 17 brown ones and 22 blue ones (along with some strings and nine-patch blocks) were used in 2013 to make this quilt.
Since Christmas, I have renewed my acquaintance with, and love for, the story quilts of Mary Lou Weidman (introduced to me by Michele, of With Hearts and Hands, a maker of art quilts). While thinking about how I could use this year's Rainbow Scrap Challenge and merge it with a fun "story" quilt, I began to think about those crumb/improv blocks and how I could use them.
A couple of weeks ago, in the wee early hours when I couldn't sleep (you know how it is sometimes), it occurred to me that I could join four 6" improv blocks into one 12" block and therefore need less sashing fabric and less cutting, pressing and seaming to get a quilt top done. In my mind, lying there in the dark, those four blocks merged seamlessly into a large block of one colour and looked fabulous. I would find a polka dot fabric (or a colourful striped fabric) on a white background to sash and border twelve of those large blocks and call it done!
Well, reality is not quite the same as my imaginings! I had made those improv blocks with no thought for tone; all that mattered was that all the pieces, no matter how small (21 pieces in the block below), were of the same colour family. The result was blocks that were an interesting mix of lights and mediums with the occasional dark.
Just because they were of the same colour family, didn't mean they wanted to play nicely together (isn't that just like families? LOL). Adding my own " rule" of not having pieces of the same fabric too close together just complicated joining those large four-patch blocks even more!
It was while I was pinning those blocks that I thought a white-based fabric possibly wasn't going to work for sashing! There were too many light colours on the outside edges of my blocks. Instead of looking crisp as they did in my head, the lights would merge with the white and the square-ness of the block would be lost. More thinking (feeling my way through) was needed.
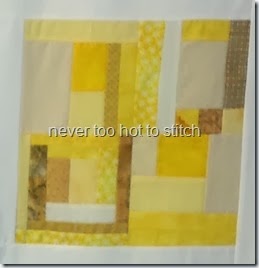
Later, it occurred to me that if I put a border around each block, I wouldn't need sashing; in fact, the borders would increase the blocks to the point where I couldn't add sashing if I wanted to or my quilt would be over the Caring Hearts Community Quilters' size restrictions (45-54” x 60-70”). But what would I use for borders that wouldn't make the whole thing look like a hodge-podge? It would need to be solid, or read as a solid, to give the crisp effect I was after. I didn't have fabric the colours I needed to make self-coloured borders (working within the restrictions of donated fabric and my limited stash is challenging in itself). I couldn't think of a single fabric I had available that would work for all twelve blocks either.
I thought I might border half the blocks in black and the other half in white (or a light neutral) and assemble the whole thing as a checkerboard! However, I had seven dark blocks and five light blocks so the checkerboard would work unless I replaced one of the dark blocks with a light one! Here’s the layout so you can see what I mean:
So, after an email discussion with Debbie of Stitchin’ Therapy, I went back to my original idea of white sashing. To get the quilt to the right size, I needed 3” sashing but that didn’t work in my head. So I decided on 2” sashing and a coloured border.
The first coloured border I tried was an attempt to use string blocks I had already made for the Rainbow Scrap Challenge (2011/2012). I was going to cut them in half, giving me a border 2.75” wide. But it just wasn’t working for me!
Since there are more purple blocks than any other colour, I decided to change the name from the prosaic Improv Blocks quilt to Violet and Friends. ;-)
Finally, I settled on a border made up of 2" squares in the colours in the larger blocks – the squares would echo the big squares in their shape and colour (repetition and gradation are two design principles I learned in art school).
So here it is. The flimsy of Violet and Friends quilt -- my "Something Old" project for January. It has moved from being a UFO to a WiP which I plan to finish next month.
I was too late for the party -- I was going to link this post to Jessica's blog, Quilty Habit, for her Sewing With Certainty series. You can pop over to Jessica’s blog to see other people’s thoughts on designing quilts.
What about you?
Do you use patterns or do you design your own quilts? Maybe a bit of both?
Do you use pencil and paper or a software program?







 and fifteen eight inch squares
 Oh, and the central theme:

