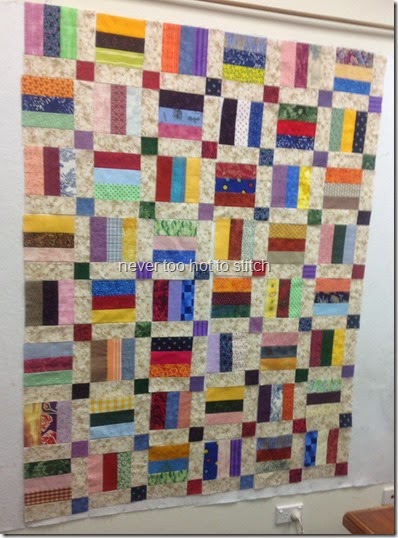
Showing posts with label quilting. Show all posts

Wednesday, 20 January 2016

EQ7 beginners' class

Not a lot of sewing has been going in in my sewing room in the past week. WM and I were away last weekend with four other couples from church. We spent Saturday having some "couple time" and ate our evening meals (Friday and Saturday) with the other couples. It was wonderful to have time together, knowing there would be no demands made on us all day!

Otherwise, most of the time spent in my sewing room has been in either practising keyboard (I'm being groomed to accompany the worship at prayer meetings) or cutting up yet more piles of scraps. There are no photos, I think you've seen enough photos of cut scraps for a while!

Today I attended a five hour beginner's class in the use of EQ7 (Electric Quilt). I had a wonderful time, learning the basics of how the program works and a little of what can be done with it.

At the end of the day, the teacher challenged us to each work from a different photo of a tiled floor and create a quilt.

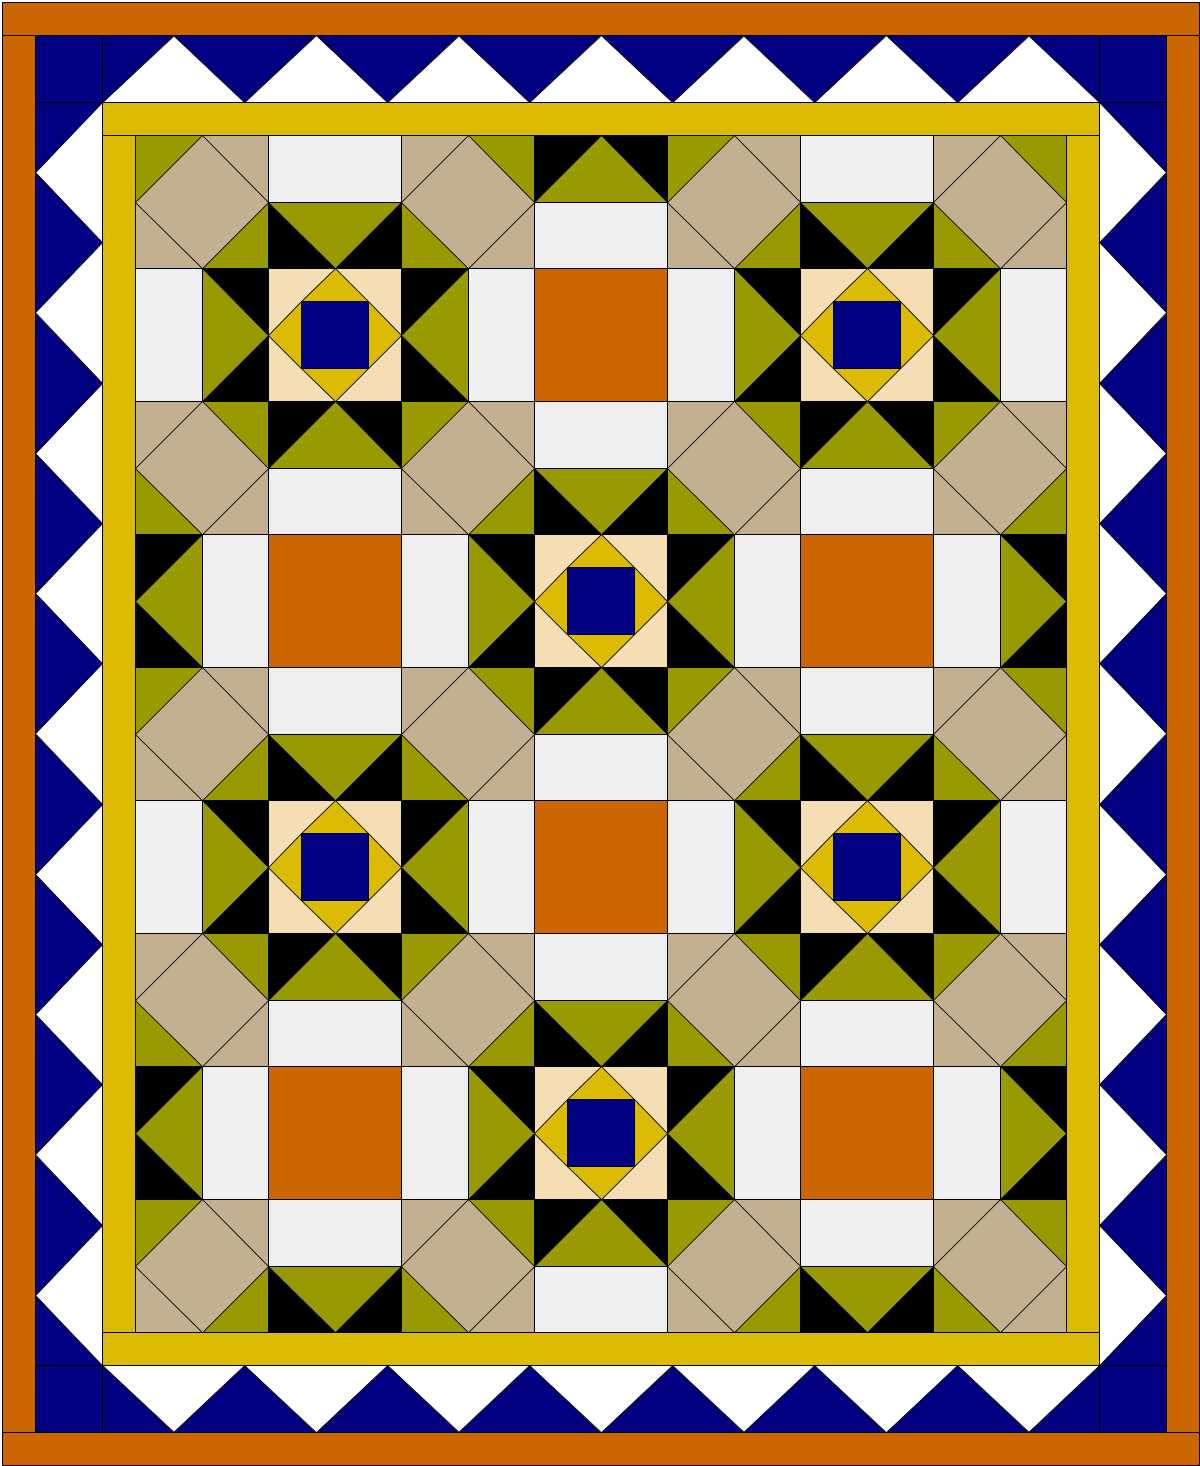
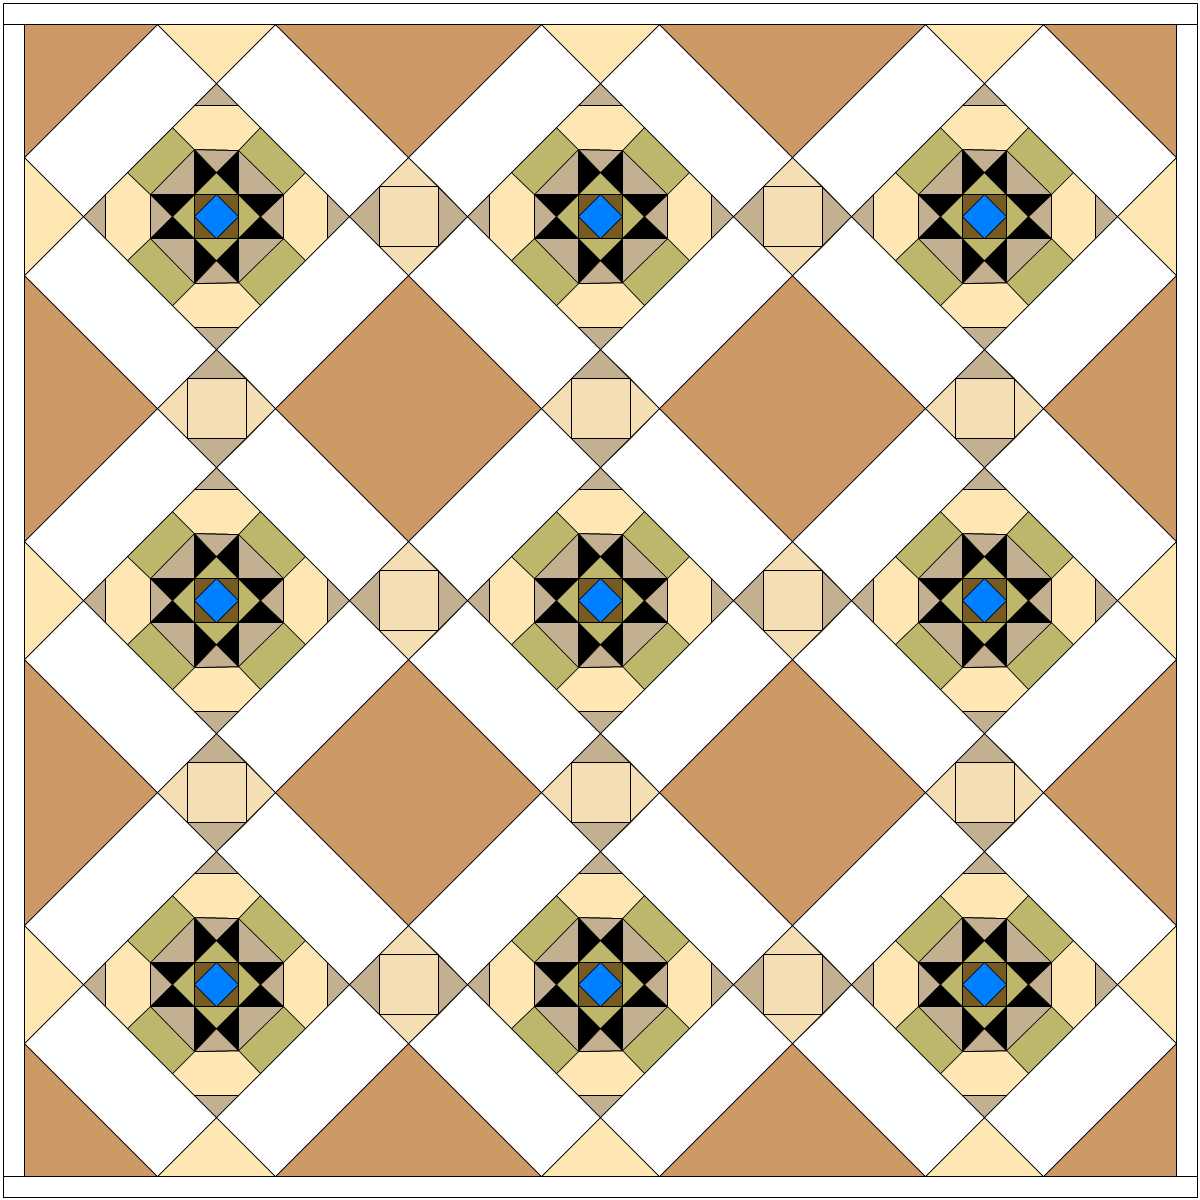
I don't have the original photo to show you but here are my creations as they were modified.

The original photo was "on point" and was quite complicated. My original attempt makes for something interesting but not at all like the original.The colours are a bit too wishy-washy for my taste.


The second image is much more accurate as to the pattern of the tiles with my modification of the colours. This quilt, in EQ7 as it stands, would be 110" square -- way too big for any quilt I intend to make in the near future! The octagons should be more prominent than they are in this layout!


This third quilt is getting closer to something I like, but still using variations of the original colours. This would be a mini quilt; it's only 30" square!


Finally, at home after dinner,  I came up with something I like and could use. I've changed the quilt to a size within the limits of our charity quilts (54" x 66") and changed the colours to something I think is much more appealing.


As I said, I loved the class and look forward to our "advanced" class in a few months time.

What have you been up to this week?


Friday, 28 August 2015

still here, still stitching

I’m sure you quilters know that moment when you lose the love for a project. It’s when the end is almost within sight but there are still some hours to be put in. Well, at least that’s how it is for me.

Actually, I don’t feel like that very often – perhaps because my quilting is usually fairly straight-forward although, as you may have noticed, I am becoming more adventurous.

I still quilt the “old way” – I knot the strands on the back of the quilt and hide the ends in the wadding. My good friend, Cindy, who blogs at Delighted Hands, suggested I try taking small stitches at the beginning and end of each line of quilting and then cutting the threads. Well, I tried that method – I really did. I even tried it in class. My teacher and I discussed it and we tried three different methods but the stitching just pulled out! So I went back to the old way.

Now that is usually not too bad but this time I set myself a real challenge. My Wonky Quarter Log Cabin quilt is made up of twenty 12” blocks. I decided to accentuate the wonkiness by echo quilting around each block. That wasn't too bad – mostly I just had one pair of ends to sew in for each of the twenty blocks.

It took a while to decide on a way to quilt the blocks themselves and finally I settled on radiating lines, carefully avoiding the diagonal through the centre of the block so as not to draw attention to the fact that different width strings don't meet at the diagonal. I chose to do three radiating lines either side of the diagonal – that’s six lines for each block or twelve ends to be sewn in – for twenty blocks.
finished quilt detail finished quilt detail 2

The first two blocks took three hours to mark up and sew, and that didn’t include sewing the ends in. I still struggle to move a twin size quilt under my machine even though my machine has a 9” harp space. The weight of the quilt drags and catches and I am still learning how best to handle the quilt for the more intricate types of walking foot quilting I do (yes, walking foot – I don’t have a good grip on FMQ and am nowhere near ready to use it on my quilts).

I did get faster with each block but I still estimate that I spent about thirty hours quilting this project and sewing all those ends in. When I thought I was almost done and realised I was only 40% of the way through, having completed only eight blocks, I lost the love.

But, I am the kind of person who likes to finish what I start and today I sewed the label on that baby!

And, guess what? I found the love again. I really, really like the quilting; especially the way I’ve extended the radiating lines into the top and left side border – a stroke of inspiration.
finished quilt from front
As usual, the back includes my signature panel made up of “left over blocks” (I actually had to make the blocks for the back as DD and OG had only made nineteen of the twenty blocks needed for the front – see this post for the full story).
finished quilt from back
I’m linking this post with Thank Goodness It’s Finished Friday which is being hosted at My Quilt Infatuation. Why not pop over there and see what other people have finished this week? Perhaps you also have something to contribute.

I’m hoping to be back soon to show you a couple of mum’s completed blankets but spring is just three days away and it’s very tempting to be out in the garden!

Until then, may your stitches bring you much joy.
Lynne

Thursday, 23 July 2015

there is work in progress

At Easter, DD and the family came to visit – it was so good to be able to spend time with them again; especially since DD and I got to spend some time together in the sewing room. Older Grandson helped to sort scraps and it wasn't long until he wanted to sew too. He loved sitting on my lap and feeding fabric in to the machine that was running on the slowest speed possible. At the end of the weekend, we had nineteen scrappy quarter-log cabin blocks of varying sizes made (they weren’t square and ranged in size from 9” to 11.5”). Unfortunately, I didn’t thing to take photos of the blocks that we made but I do have some photos of Older Grandson hard at work!
 2015-04-03 Ben sews on machine 2 2015-04-03 Ben sews on the machine 2015-04-03 Ben irons

In May, it was announced at our quilting group that there was going to be a log cabin challenge for all of us to use up scraps! Seems like I was already ahead of the game! LOL

I searched the internet for inspiration – I had absolutely no idea how to put those blocks together given their different sizes and shapes. But sometimes, I just have to be patient and let ideas percolate. In the end I decided to go with a wonky setting but I still had no idea how to go about it. I started looking at tutorials, but all the ones I found were for making sashing on all four sides of he block. I wanted to add sashing on only two sides. In the end, I found my own away to do it – the wider you cut the sashing and the more fabric you are prepared to ‘waste’, the better this works. Again, it didn’t occur to me to take photos of my work in progress – you can see how out of the habit of preparing for blog posts I have become!

Armed with twenty blocks (I made the extra one), I headed to class at my LQS. They have a design wall – I do not! My teacher, who loves traditional patterns and Civil War fabrics, is quite bemused by me sometimes, I think! Here I was with a totally radical modern approach to quilt blocks and I hadn’t even consulted a pattern! I did take a photo of my layout on the design wall but have since deleted in from my iPad – because I’ve finished the quilt top. Here it is for your enjoyment:
 finished front

I have also finished the backing.
finished back

The fabric used for the sashing and the backing is Saffron Craig’s Ginkgo Blossoms (c.2009). I used about three and half metres to make this quilt which will finish at 52” x 64” and is made up of twenty 12” blocks plus extra sashing down one side and across the bottom.
This one is basted and in the process of being quilted.

While I was on a roll, I made the backing for another quilt which I had finished in October last year.
on design wall

It is made from ‘Disappearing Nine Patch’ blocks with one modification – I made the neutral pieces of the nine patch smaller than the coloured parts; thus giving a thinner sashing than would otherwise be seen.
ready to cut and disappear

Here is the finished backing, containing my signature panel. the blue sashing gives a completely different look to the neutrals on the front! I have laid the blocks differently too – to form a type of ladder. The backing fabric is a small yellow check, not the solid it appears in the larger photo.
 finished back backing fabric
My sewing time is taken up with quilting the Wonky Log Cabin quilt; then I’ll get to the Scrappy Disappearing Nine Patch.

In the meantime, my knitting time is spent trying to catch up with my mum who is powering ahead knitting blanket strips. Come back for my next post and see another of her knitted blankets that I have finished.

I'm linking this post with WiP Wednesday over at Freshly Pieced blog. Why not pop over and see what other crafters are up to?

May your stitches bring you much joy.
Lynne

Sunday, 19 July 2015

Violet & Friends and the Scrappy Churn Dash

No, it’s not the name of a new children's book or television program. The title is a combination of two of my finished quilts: “Violet & Friends” and “Scrappy Churn Dash” (see what a difference punctuation makes! LOL)

Violet and Friends was begun in 2011 when I first joined the Rainbow Scrap Challenge over at SoScrappy blog. It continued in 2012 as I made more blocks. Finally I had enough six-inch crumb blocks to make a quilt top in violet, orange, pink, yellow, teal and green. I shared a picture of the finished top and the backing panel (it’s my signature to use panels on the back of my quilts) in a post in February last year – obviously I can’t rush into finishing! LOL

This year, I seem to have caught some kind of ‘finishing bug’; instead of starting new projects (so easy to do), I’ve been finishing old ones. Perhaps having mum here is a reminder than one day I may not be able to quilt (or knit) – and I wouldn't want DD to inherit lots of unfinished projects. I inherited three knitting projects of mum’s – one I’ve ripped and re-purposed the yarn (into part of one of mum’s blankets); the other two I’m thinking I’ll turn into one blanket instead of the two that were originally intended.

At Easter, I chose a fabric for the backing and hey presto! A week later, Violet and Friends was finished: quilted, bound and labelled!
 finished quilt front  finished quilt back
The quilting was inspired by two classes I took on Craftsy: one was “Creative Quilting with your Walking Foot”, tutored by  Jacquie Gering; the other was “Dot to Dot Quilting” with Angela Waters. Angela’s class was basically about FMQ but I took her ideas and meshed them with Jacquie’s ideas and came up with my own walking foot diamonds (I tried FMQ but I can’t do it to my satisfaction – yet!).
 V&F custome quilting
It’s custom quilting and, in my opinion, looks great!

The other project in the title, Scrappy Churn Dash, was also started as a ‘Rainbow Scrap Challenge’ project. In January this year, the colour for the month was blue. I had always wanted to make churn dash blocks so made 4.5” squares for the centres. Then I chose a solid chocolate-brown (most people think it’s black) homespun for the churn dash – brown because it is a shade of orange, the complementary colour of blue, this given some warmth to what could have been a very cold-looking quilt. You can see the story of these blocks here in this post from January 2015.
 finished quilt front
I have several metres of one particular blue fabric so the choice for the backing was pretty easy. I only had to make my signature panel. What I had in mind was to ‘float’ churn dashes over the background but the fabrics I chose don’t stand out enough -- I probably should have gone for light colours rather than darks because this medium tone fabric is obviously darker than I think!
  finished quilt  back 
Anyway, the backing came together quickly and the quilting was done using my new quilting signature – diamonds! This involved more custom-quilting that took a very long time considering there are sixteen four inch squares, eighteen half squares, twelve diamonds, fourteen half diamonds, and four quarter diamonds that were all individually quilted. The only parts that aren’t quilted are the churn dash motifs themselves and the squares in the centre of each churn dash – my teacher and the owner of my LQS both agreed there was more than enough quilting on there to hold the layers in place! It is a donation quilt, after all, and my time is better spent making another quilt than in over-quilting!
BCCD custom quiltingBCCD custom quilting from back

My quilts measure about 52” by 64”, so there is quite a lot of turning of the quilt in the quilting process; just as well I bought a machine that has a largish throat! The downside of custom quilting, apart from having to turn the quilt a lot, is all the ends that have to be sewn in when the quilting’s done!
And before I go, I just have to show you my sunglasses case that I also finished in March
sunglasses case
and my zipper pouch with box corners that I finished in April.
lingerie zipper pouch lingerie zipper pouch inside and out   lingerie zipper pouch box corner

Putting a zipper in is not as difficult as I thought and I look forward to trying some more – I watched several tutorials and think I’ll try this one from Jenny Doan of Missouri Star Quilting Company next.


The sunglasses pouch was made from a tutorial by Gourmet Quilter. I’m not entirely happy with mine but I can see ways of improving on the next one!


After Scrappy Churn Dash was done, I took a few week’s break from quilting and patchwork to work on some family history but now I’m back in to the stitching groove and will be back soon to show you my works in progress. Look for that post next week; Thursday at the latest as I link up with WIP Wednesday over at Freshly Pieced blog.

Until then, may your stitching bring you much joy.

Wednesday, 15 July 2015

knitting continues but it’s not my choice of project

Firstly, welcome to all my new followers; many of whom have started following since March when I wrote my last post. I hope you’ll stick around but I’ll understand if you don’t; my posts are very sporadic due to the turn my life has taken.
~~~~~~~~~~~~~~~~~~
As long-term followers would know, I have given up knitting in yarns that I don’t like the feel of – acrylic being top of the list. I am not a yarn snob but I’ve decided life is just too short (and my stash is too big) to knit with yarns that I don’t like. Some acrylics are very soft; for example, the new “Stallion” yarn from Spotlight is lovely and soft but an 8ply (DK) it is not! However, most of the acrylics I have worked with over the years are quite harsh and have a very plasticky feel; which, I have to admit,  I didn’t notice until I started working in wool or sock yarn more frequently!  At Easter, I still had quite a bit of acrylic yarn in my stash but was slowly getting rid of it by sending it home with DD each time she came to visit!

I had also given up knitting blankets in favour of smaller projects. A blanket can warm only one person but the yarn used (about 1 kilogram) can be used to knit beanies, fingerless mitts and scarves, thereby keeping several people warm. I have nothing against knitting blankets; it’s just not what I choose to do with my time. I prefer to knit socks or to challenge myself with a new pattern or technique.

Then mum came to live with us; we thought it would be for a few weeks but we were naive about how long the process of getting someone into an aged care facility takes!

She had not knitted for a couple of years but her interest was renewed when she saw me knitting. That would be fine but she can’t remember how to cast on or cast off; and she can’t fix her problems if she drops a stitch. Even if she accidentally creates a stitch (I still haven't figured out how she’s doing it) then gets towards the end of the row, she doesn’t know what to do with the extra stitch (or stitches) at the end of the row. If she started with fifty stitches and there are now 51, she just goes to pieces.

There is no concept of “wait” and if I ask her too, she gets all huffy. Then she stands over me until I’ve dealt with the issue and sometimes that means unpicking several rows of very tight knitting!

Anyway, you get the picture. Despite all that, mum’s output is more than I can keep up with. Firstly, I have had to buy more straight needles and acrylic to keep her in knitting supplies! *sigh*

Since she came to live with us, eighteen weeks ago, she has knitted squares for one blanket (I spent much of my recent holiday/vacation sewing blanket squares together) and enough strips (I’m not sewing squares any more!) for three full blankets and is currently working on the final strips for the fifth blanket (she knits two strips alternately so that she always has knitting ready to go).

I now use all the time I would normally spend on my own knitting projects (plus some) making sure she has knitting to go, ripping back where there are too many rows in a strip and knitting strips together to make blankets! Apart from the leg of one sock, I have not had time to knit my own projects. So much for the cardigan I was going to make for myself to wear in spring (starts Speedometer here in Australia)!

I could knit during the day while she’s busy knitting, but I’m making quilts or doing family history.

Anyway, enough; this post sounds like I’m complaining …. I intended it to be a post to show what mum is up to and to let you know that I am, indeed, still in the craft world.

So, here we go...

the blanket made from squares which I sewed together (tricky when the “squares” are all different sizes and tensions):
 mum's blanket #1

and the blanket made from strips which I knitted together and grafted by the no-sew-method taught by Galena Khmeleva in her Orenberg lace workshops.
   mum's blanket #2
Both photos were taken from the front deck of the house we rented for ten days’ holiday/vacation in June. (It was supposed to be a holiday but planning, shopping and cooking – even with assistance - for eight people every night is not a holiday for me!)

I was going to show you the pile of strips but it’s uninteresting so you’ll have to wait until the strips become blankets! 

In my next post I’ll show you the quilting projects I have finished since March. Expect the post on either Friday or Saturday when I link up with Thank Goodness It’s Finished Friday.

Until then; may your stitches bring you much joy!
Saturday, 28 March 2015

finishes!

I’m linking this post with Thank Goodness It’s Finished Friday which, this week, is being hosted by Janet at Simply Pieced blog.

Last week, before I went away, I managed to get the binding on my teacher’s donated quilt and to hand sew it down. The trickiest part of the project then loomed – getting all the pencil marks out of the border. I’m not sure how long they had been there but my teacher intimated that it had been a while. I rubbed Amway’s LOC into every inch of that border by hand; it took ages. Then I put it in my front-loading washing machine, prayed and let the machine do its thing! An hour later, I hung it on the line – there was not a pencil mark in sight! Praise the Lord!

Sometimes I look at the binding fabric and wonder if I made the right choice. It’s a green and beige stripe; I think it’s a Debbie Mumm fabric. The green is very similar to the greens in the quilt but, because the beige stripe and the green stripe are the same width, from a distance it reads as a muddy light khaki colour!  Up close it looks fine but from further away: well, I’m not so sure. However, it’s done and I’m not going to change it – mostly because I didn’t have any other more suitable fabric here to use! The photo shows my first quilting of a curved line using my walking foot and following a pattern.
 Kerrie's quilt 2 quilting and binding

So, may I present K.’s finished quilt (remember, I didn’t make it; I only quilted the border, bound it and washed it). Unfortunately, the colours are a bit washed out -- the photo above shows the real intensity of the colours.
Kerrie's quilt 2 faded colours

But wait, there’s more…

Yesterday afternoon, I joined the pre-cut binding strips and attached the binding to my Jacob’s Ladder Goes Barn Raising quilt. Last night, as mum and WM watched the football (rugby league), I sewed the binding down. This afternoon I sewed down the two sides of the label that weren’t held down by the binding.

So, for your further viewing pleasure, may I present another finish:
 Jacobs Ladder finished Jacobs LAdder back shows quilting

And in knitting news (drum roll please!)…

Last December I started knitting a bear for my great-niece at the request of my niece who bought the pattern and sent it to me. It was a very fiddly knit; lots of teeny-tiny pieces. When I pulled it out last week, I could not figure out where I was up to so decided to start at the beginning of the pattern and put all those little pieces together as directed (I had knitted them on a long train journey and didn’t have the things I needed to sew it together at the time). The head (seen left of photo ) seemed way too big for the body but I proceeded anyway!
charley bear

Surprisingly, it came together much better than I thought it would. I sat in the hairdresser's shop last Friday morning (20 March) waiting for mum to have her hair set and worked on the legless bear  and left home (for the wedding) last Friday with a bear that just needed some final adjustments. On Saturday, by the time we needed to have lunch and get ready for the wedding, I had got it to the point where I had to add only one more eye and some paw prints on one foot. I procrastinated on that second eye for a couple of days – I really dislike embroidering faces on knitted toys – if the eyes are wrong the whole thing is wrong! the pattern called for buttons but I don’t sew buttons on toys for two-year-old children I prayed and took courage – and it turned out much better than I’d even dared hope! I am very, very pleased with how this turned out!

2015 Charley Bear

The greatest compliment came when my niece said “it’s Charley Bear” and my sister came to have a look. She almost reeled in shock when she realised I had knitted it! Charley Bear is a TV character for under-fours. Here’s a clip for those not familiar with the show (I have grandsons so I’ve seen it many times).


I’m hoping to see another quilted finish and another knitted finish before next weekend! Hey, when you’re on a roll … LOL

Wednesday, 18 March 2015

plenty of sewing time

Just popping in with a short post …

Mum is doing well; she has improved physically in the week she has been here which is a good sign. She is no longer stooped and shuffling; being undernourished will do that to you! Instead, she is eating very well and has regained her usual stride. Yesterday she even worked out in the garden with WM for a couple of hours.

Her biggest interest is reading and she spends hours absorbed in books. This frees me up to be in the sewing room so I am getting quite a bit done.

A couple of weeks ago, my quilting teacher donated a partially completed quilt to Caring Hearts Community Quilters – all I had to do was finish the quilting, make binding, attach it and sew it down. I have done all but the last task, so no photos until I show you the finished project!

My Jacob’s Ladder Goes Barn Raising is quilted. Life is so much easier when I think about the quilting before I pin baste; then I can position the pins out of the way of stitching lines. The quilting was done in no time but it seemed to take almost as long to sew in all the ends! You can’t see it here (because the photo is pre-quilting); I sewed diagonal lines about 5” apart through the centres of the squares that make up the diagonals.
JLGBR top finished

The binding is cut and waiting for the strips to be joined.
binding cut

I have also been knitting! Shock of shocks!!

In the past three days, I have worked on Crinkles Hoodie by doing a three needle bind off on the shoulders and starting the first sleeve (the photo, which is of the back, is really not worth showing but I know you like pictures! LOL)
2014 Crinkles Hoodie back

Last December, I started knitting Charley Bear for my great-niece who will be two next month; I began on the train on 16 December and haven’t touched it since. On Monday, I stuffed the body and head. I am so not enjoying this! There are so many fiddly little pieces to come, of the type: CO 4 stitches, K 2 rows, increase either end of next row, knit 1 row. Bind off! I have no desire to be a toy maker! The head is on the left; it seems proportionally too large for the body!
charley bear

And I’ve finished a pair of small women’s socks which were started on 21 February. The second sock was cast on 6 March.
socks for someone #8

My current reading is varied, but includes 100 Days of Real Food by Lisa Leake. She started a blog a few years ago and it led to a book! Our copy only arrived yesterday so I’m not really in a position to write a review just yet. It certainly is an interesting read.

There are some advantages to having had to cut back on my away-from-home activities, at least for a few weeks! ;-)

Linking up with WiP Wednesday and Yarn Along when they go live.
WIP Wednesday at Freshly Pieced         


PS Is anyone else having trouble with Firefox working very slowly or is just us?

Sunday, 8 February 2015

slow stitching on the first finish of February

I’m linking this post with Slow Sunday Stitching over on Kathy’s Quilts blog when it goes live later today (it's 7pm Sunday here in Sydney, Australia).
Slow Sunday Stitching
This afternoon, I hand-stitched the two sides of the label that weren’t held down by the binding – a ten minute stitching project that saw my Green Scrappy Strippy quilt completed and become my first finish for February!

This project, started in July last year, was obviously inspired by the Jelly Roll Race quilts. However, this quilt is more thought out – all the fabrics used were graded from light to darkest and the lightest strip is one third from the top of the quilt.
top completed
Some of the fabrics, such as the ‘red’ strip at the bottom, don’t even read as green and yet, to my eye, they said ‘green’! Perhaps next time I’d better take a photograph of the fabrics to see what the camera sees!

There are thirty-two rows of 2” strips in this quilt – and I’ve barely made a dent in my green scraps! I wonder what month will be green over on the Rainbow Scrap Challenge which is hosted by Angela at SoScrappy blog.

I quilted this about every four and a half inches apart, with two horizontal rows of quilting, about half an inch apart. I say ‘about’ because, to me, quilting is an art as well as a science and imperfections show that it is made by hand not produced by machine! You can see the quilting better from the back, which also shows my quilting ‘signature’: a pieced panel to widen the fabric to the needed width; in this case the gingham fabric was only 36” so I added a 20” panel giving 56” before trimming. (Yes, those light strips truly are green!)
green scrappy strippy back showing quiltng
Although the three layers of the quilt sandwich are well-and-truly joined, I wonder whether I should have added vertical quilting to stop the batting from doing whatever wadding does when there isn’t enough quilting. Please feel free to offer a constructive opinion!

I made eight nearly-WOF lengths into binding and should have realised I had a problem when the base of my Teflon-plated iron gripped the fabric instead of sliding over it. But no – sometimes I miss the obvious! I tried to sew the binding onto the quilt – got about a quarter of the way around (about nineteen inches) when the whole quilt slipped and instead of stitching 1/4 - 3/8 inch from the edge, I was suddenly stitching at about 1/16” for about four inches (slow down driver!)! Of course, that meant some unpicking. In the end, I decided to remove the binding completely – I just didn’t feel right about it.

The following day, not being able to find enough of another fabric to make binding, I decided to go with it. My iron stuck to it again and it smelt awful. Obviously it was a polyester blend and something that felt like plastic doesn’t belong on the bound edge of a lovely soft cotton quilt! In the end, I used three different, similarly-coloured, green fabrics that read as the same tone – look closely, you may be able to see them! (probably not!! LOL)
green scrappy strippy finished
Here’s a close up of one of the fabrics, I’m getting better with my mitred corners! It’s actually much darker than this photo shows – I like dark bindings – but the mitre wouldn’t show when I darkened the photo!
green scrappy strippy corner and binding fabric
So that’s it! My first finish for February and my second personal finish for 2015 (sixth if you count the four projects I completed in January that were other people’s starts!)

I'm also linking this post with Thank Goodness It's Finished Friday (I'm a little late) which is being co-hosted at Quokka Quilts and A Quarter Inch from the Edge (I've linked at the latter).

So, what do you think? Should I go back and add some vertical quilting? (I’m not taking the binding off!)
What would you do?