Showing posts with label scrappy. Show all posts

Thursday, 10 March 2016

I may have a scrap problem...

Check out a new linky party while reading my latest post at Never Too Hot To Stitch!

See what this is all about!
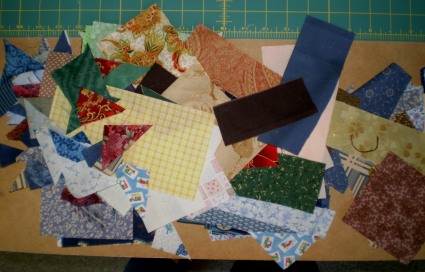
scraps on edge of cutting table

Friday, 8 January 2016

works in progress


The first week of January is almost done. It was as wonderful to have various family members visiting at Christmas and to visit other family members, but it seems a long time ago, despite being less than two weeks! Even New Year’s Eve seems longer than a week ago.

WM has returned to a normal work roster after a four-day weekend for Christmas and a three-day weekend for New Year. It’s summer here (although you’d never know it from the cool temperatures and rain we've had this week) so my quilting class is in recess until February. I've had lots of time in the sewing room and I've tried to make it profitable.

In the weeks leading up to Christmas, I spent many hours pressing, sorting, cutting and storing scraps. This is after a couple of days of that activity (the strips were cut specifically for the project mentioned further down this post):


Some of my tubs (shoe-box sized plastic containers) were getting very full; most notably the ones containing 2 1/2" squares, 3" squares and strings/strips of all sizes.


Before Christmas I began a “leader/ender” project that took over my sewing time. The project I had planned required me to make lots of HST units measuring 2.5”. That took care of the 3” squares – I still haven’t made enough and I'm running out of squares! So far I've made 320 units (I need 400) and trimmed 104 of them! They call to me constantly from the edge of my cutting table where I have them stacked in groups of twenty for ease of counting. Here are 200 stitched HSTs waiting to be trimmed!


The unused squares call to me every time I sit down at my sewing machine – they are right beside hard-working Jan waiting for the next time a leader’'/ender is needed.


In November, DD and the Grandboys came for a visit. They wanted to sew and decided on ‘spider webs’ so we began making monochrome 60° triangles from strings which we had first sewn into 8.5” squares. They, of course, did very little sewing and little progress was made. After they left, I cut up 144 x 9” strips (of various widths) in five colours –yellow, green, purple, blue and red. I wanted to see how it would work out and sewed all the yellow strips into blocks then cut the triangles. It didn't take me long to realise that we were, in fact, not making spiders webs but giant hexagons!

I looked at pictures on the internet and discovered that spider’s webs were made up of eight triangular units, not six; and that they were generally not made in monochrome fashion!

So, when DD and the family were again for Christmas, we made the decision to use the triangular shaped wedges in a different way; inspired by this pattern in the book Scrap Republic (by Emily Cier). Emily’s pattern is called “Slices”.

We are not yet sure how we will put the units together – that is still quite a way off. We have made all the yellow, green and purple triangles, leaving some of the red and blue ones (their favourite colours) for the boys’ next visit (probably April). Here is the stack of “wedges” we had prepared by the end of December.


The good thing is, because we made squares first them cut the 60° triangles, I have lots of ‘wedges’ left over – there will be almost enough for another small quilt!


Despite being ‘surrounded’ by these two works in progress, on Monday, my first day of sewing without any need to go anywhere or do something else, I returned to an almost forgotten UFO. I started Green Strips and Triangles in July 2014 but abandoned it as being too much trouble. I distinctly remember I couldn't work out how to make sure the strips were long enough to make the 10.5” (unfinished) squares I required. I didn't want to make the blocks QAYG but somehow, the strips never seemed to work! Time, of course, gives a fresh perspective. I realised in the wee hours of Monday morning that I could use foundation piecing to make the blocks and, if I used a wide strip on the centre diagonal, I could make an 11” square (I actually made them 11.25” to give myself a little leeway), I could then cut the white fabric into squares, sew 1/4” from the central diagonal then cut it into two pre-made squares! Why did I not think of that back in 2014? (Although I had made QAYG blocks on wadding/batting, I hadn't ever done foundation piecing on paper back then but now, having learned the technique, it made perfectly good sense!)

Alas, all that preparing foundations then tearing them away afterwards became such a time drain – I decided there had to be a better way. Eventually, I marked out a ‘template’ on my cutting mat and used that. It worked pretty well; not as well as the paper foundations I admit but I got the job done more quickly!


In 2014 I had made four blocks, two of them  wrongly! In three days this week, I made the other twenty-eight blocks I needed! Here are three of them in the setting I plan to use.

As I sewed and pressed and cut and sewed some more, I thought about how I will quilt it... The strips are easy; I'm pretty sure that will be straight line quilting, running parallel to the strips themselves. But what of that self-striped triangle -- what should I do there? I am not competent at FMQ and this is a donation quilt. On the other hand, it might be time to start practising!

What do you think?

I'm linking this post with WiP Wednesday over at Freshly Pieced.

Wednesday, 11 November 2015

finished flimsy

In September, DD and the Grandsons came to visit for two weeks – which was wonderful. It seems so much longer than five weeks since they left. After his experience at Easter time, Older Grandson wanted to sew! This time, Younger Grandson wanted to sew too – but the truth is, he just wanted to be allowed to play with the buttons and dials on my sewing machine!

Older Grandson decided that since he had made blocks from strips last time, this time he was going to make blocks from squares. He chose my container of 3” squares. There was no way that I was going to be left making a quilt entirely from 5” four-patch blocks (b-o-r-i-n-g), so I looked through a book which I later gave to DD (so I can’t tell you what it was called – WM found it at work and brought it home in case I was interested in it) and decided to make a block comprised of two four patches and two units containing half-square triangles. In the unknown book, the block is called “Road to California” but in my “Encyclopaedia of Pieced Quilt Patterns” by Barbara Brackman, the block with this name is a nine-patch block. I couldn't find the block we were making in the Brackman “encyclopaedia” but I eventually found it on EQ7 as “Road to Oklahoma”. The version we made has a light square in the corner where EQ7 has a dark square but, essentially, it is the same block.

OG quickly lost interest when he realised that more care had to be taken when choosing a light square and a dark square (as opposed to randomly selecting any strip) and aligning them carefully before sewing them together. He also realised that all his younger brother was doing was pushing the start/stop button and so that’s what he decided to do too! Therefore, I really can’t say this time that the blocks were made by either grandson. DD, too, lost interest because of the matching of points that has to take place – she’s a perfectionist and if it wasn't exactly right she got frustrated (I can live with a millimetre or two out!) So, in essence, I made the entire flimsy.

At first, I really didn't like it. The lights and darks weren't working as I thought they should. It just seemed too scrappy, too disordered; I like scrappy but need it to be controlled somehow -- usually by the pattern of lights and darks, and this just didn't seem to be coming together. I still don’t have a design wall so I have to use the floor to see what I'm making. Because the blocks were ten inches finished, I needed to have five and a half blocks across and six and a half blocks down to make the flimsy within the size requirements of our quilt group. I, therefore, could see no other way to set the blocks but “straight”; that is, every block (or half block) facing exactly the same way. If I’d had an even number of blocks both ways, there all kinds of permutations on EQ7 that I could have used. But it was not to be!

What is surprising is how quickly this came together; especially considering there 715 pieces in this quilt top. I really didn't want to work on it but had to keep moving the finished blocks and part-blocks every time I wanted to do something else (like play the piano or use the computer). So I bit the bullet and got to work on it. It took three days but I finally completed it last Thursday. So, here for your viewing pleasure, is my Road to Whoopi flimsy. (“Whoopi” is the nickname given by the locals to Woolgoolga, the town where DD, SIL and the grandsons live). Don’t look too closely then you won’t see all the places where the points don’t match exactly! ;-)
2015 R2W flimsy

It’s not by favourite quilt by any means but, seen in this photograph, the lights and darks are working as they should and the extreme scrappiness is under control. I think I'll quilt it with a light thread through the diagonal light squares (going down from left to right) and with a darker thread through the diagonal dark squares (going the opposite way). But first, of course, I have to make a backing.

Hopefully, I'll be back sooner rather than later to show you either the finished quilt or some photos of our garden or of the grandsons on their recent visit.

In the meantime, may your stitching bring you joy.

Sunday, 1 March 2015

saying goodbye to pink

It hasn’t been a very productive month, sewing-wise, for me. In the middle of the month, my uncle, who has been researching my paternal family for many years, sent me some information from a distant relative that neither of us has met. At first I only glanced at it, then I decided to read it, then I compared it to the information I had in my family tree. I was hooked! I spent all my days working on my family history – refining and adding. I’m an “all or nothing” kind of gal; when I get involved in something I don’t do it by halves; and so (almost) the rest of month passed without a stitch of sewing!

I did, however, do some knitting! Don’t fall down in shock! Last Saturday, I had to attend a meeting of the local branch of the Knitters’ Guild (I was tutoring on ‘planned pooling’) so knitting was needed! I cast on a sock during the meeting and finished on Friday afternoon. I don’t normally knit during daylight hours but I had dropped a couple of stitches and couldn’t see by the poor light in our living room to pick them up so I had to do it while the sun was shining! And, as luck would have it, the sock is knitted in Moda Vera Noir (a sock yarn) in the colour way “pink mix”!

2015 Sock for Someonr #8


I say “luck” because pink was the colour for this month’s the Rainbow Scrap Challenge. At four o’clock yesterday afternoon, I settled into my sewing room. I had told myself that I would spend an hour cutting and sorting but that just depressed me – after two weeks away from my sewing room (I didn't even attend class last Monday because I had a raging headache) I just wanted to sew. Knowing that it was the last day of ‘pink’, I decided to use my pink crumbs and have some fun. I started out with the intention of making 4.5”  squares and just started sewing crumbs of roughly the same length (on one edge) together. Then I sewed those pairs to other pairs and, in the end, decided I would just sew them together “free-form style” (a knitting term; I guess it’s just a form of crazy patchwork!). I deliberately cut things on strange angles – nothing mattered to me except stitching straight lines (so everything would lay flat at the end) and making sure I had a minimum of a quarter inch seam allowance (some seams are a bit wider wider)!

I finished with a rectangular piece of fabric (15” x 9.5”) that is made up of about 70 pieces of fabric! It will go on the back of a quilt – at least that’s the plan till I suss out the situation in my quilting group: will a truly modern quilt be acceptable? The next piece of ‘crazy’ patchwork will have even more odd angles – the ones I’ve cut here barely show in the finished piece! The bottom right side is looking really good! That’s what I was aiming for!

2015 70 piece jigsaw

So it’s goodbye to pink sewing for now (I will knit the other sock – I don’t like Second Sock Syndrome! Besides, sometimes my tension/gauge changes if I leave too much time between the first and second sock).

Autumn began here today so I’d go for for red, brown, orange or yellow as the colour for March! But Angela, who hosts the challenge, lives in Florida and there’s no chance she’s thinking of Fall now! I’ve just checked…

…it’s yellow!


RSC 15

Are you participating in the Rainbow Scrap Challenge? Even if you’re not, why not pop over to Angela’s blog and see what other’s are up to with their pink scraps.

Thursday, 12 February 2015

pretty (scrappy) in pink –- a work in progress

Deb, who blogs at A Simple Life Quilts, and I were email-chatting the other day about quilts in progress. I mentioned that I had a pink and purple row-by-row quilt in progress and should pull it out, given that the colour for the Rainbow Scrap Challenge for this month is pink.

This is the story:

Last year, I wanted to learn curved piecing in my quilting class; at the time pink was the colour of the month. I chose to make scrappy pink blocks (hey, why not try something a little more complicated when you're learning a new technique? LOL) So I made these blocks based on an idea in Scrap Republic by Emily Cier. Each of those Drunkard's Path blocks is 4.5”.
curved piecing completed
I laid them out in a traditional style Drunkard’s Path meander but I didn’t like it so I turned them into circles (as the photo above suggested).
circle blocks completed
I realised I didn't like making four-inch curved blocks enough to make a whole quilt so what was I to do? Make a row-by-row quilt, of course.

Some of my classmates and I went on to do foundation piecing: it  was still February so guess what colour I used for my foundation piecing?

Here are the four blocks I’ve made so far:
first four foundation blocks 10 Feb 2015

I still have two more to make; they will have the same fabric in the centre. Then I’m not sure whether or how I will sash them.

At home during February, I thought I would use some more of my pink scraps in a new-to-me piecing style: tumbler blocks – here are the first five joined
first column of tumblers joined

and here they are on my design wall (at the old house) in the layout I had chosen:
2014 pink tumblers

Since then I’ve realised I need to go wider with only five rows of blocks (hence the five joined together above).

Kate, who blogs at Kate’s Quilting (and other arty stuff), and I shared a couple of emails about scrappy quilts generating more scraps and that was certainly true of my Drunkard’s Path blocks – there were a lot of scraps left over. So what would I do with them? Turn them into improv crumb piecing, of course!
first pink blocks first purple
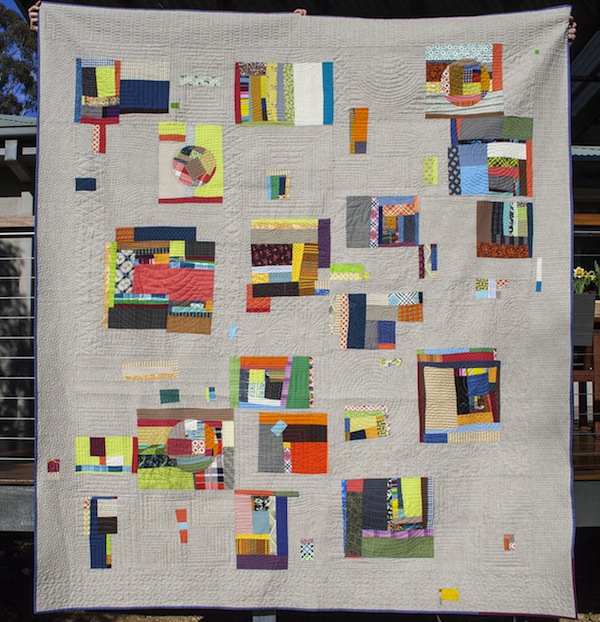
They’ll go on the back of the pink and purple row-by-row quilt; I can’t help sneaking a bit of ‘modern’ piecing into the backs of my quilts (look here for an example). Because most of them go to older people in palliative care units, we tend to be fairly traditional in our quilt making – but I always put a signature panel in the back of mine which tends to be a bit modern looking! This probably won’t be so much a panel as scattered; like this one (Icy Improv Pods by Elizabeth Hartmann of Oh! Fransson) or this one (though not as detailed as this which is Faraway Fields by fellow-Australian, Jules, of Procrasticraft).

So, this row-by-row is the project I’m adding to during this month of pink; and also in the month we have purple in the Rainbow Scrap Challenge.

I’ll be linking this post to Scraptastic Tuesday at Mrs Sew and Sow, WiP Wednesday over at Freshly Pieced blog, Needle and Thread Thursday at My Quilt Infatuation and the Rainbow Scrap Challenge (RSC) at So Scrappy blog as they go live this week.
WIP Wednesday at Freshly Pieced Scraptastic Tuesday
Needle and Thread Thursday
RSC 15
Are you joining any of these linky parties this week?


Tuesday, 10 February 2015

it’s February and some people’s thoughts turn to hearts

This is not the story of a finished quilt, so I hope Val will forgive me – but the Tuesday Archives link-up at Val’s Quilting  Studio looks like so much fun, I couldn’t help wanting to be a part of it.
Val's Quilting Studio

I have to say, this soon-to-quilt-top is one of my favourite projects ever and I’ve blogged about it several times but it’s never had it’s own post.

In 2011, DD and I , with two month old Younger Grandson, made the hour and a half trek across Sydney for the inaugural meeting of what was to become the Sydney Modern Quilt Guild (now the Sydney Modern Quilt Group). We needed a hand-stitching project to keep us busy (well, DD had her hands full anyway) during the three hour meet-up. I had recently acquired an Accuquilt Go! Baby and had been keen to try it out.
opened ready for use

I’m glad I learnt how to do fused appliqué in the few quilting classes I had taken at that point. I had also done embroidery in my past which, of course, included blanket stitch. Putting the two skills together, I was able to work on some of these:
2012 Sep 6 two hearts done

Over the years, DD and I carried appliquéd hearts to meetings of the Caring Hearts Community Quilters and eventually I had thirty blocks done. But they were only 6” (yes, I was a new quilter and forgot to add seam allowance when cutting the squares) so I needed more blocks – or I needed to enlarge them somehow.

Inspiration came from two sources: a chance overhearing of a comment from someone in our quilting group  on the merits of appliqué and/or scrap quilts; the other from the Dresden wedding quilt made by Jess at A Quilty Habit.

I enlarged my blocks and  made them scrappy!
2013 red block with border

And I worked on the layout until I came up with this:
blocks done and final layout

So, the obvious question is: if I love these blocks and this layout so much; why has the project stalled?  Well, firstly, we moved house! That slowed all projects down for several months! But, more importantly, I know I need to add white sashing between the blocks but I'm not sure how I want to quilt it (using a walking foot; FMQ is out of the question for now). I think I want to echo quilt around the hearts but dragging the whole quilt though my domestic machine (even though I have a 9” harp space) doesn't inspire me so I’m considering QAYG row-by-row (gasp!)

What would you do if you were a novice quilter with little FMQ ability?

Sunday, 8 February 2015

slow stitching on the first finish of February

I’m linking this post with Slow Sunday Stitching over on Kathy’s Quilts blog when it goes live later today (it's 7pm Sunday here in Sydney, Australia).
Slow Sunday Stitching
This afternoon, I hand-stitched the two sides of the label that weren’t held down by the binding – a ten minute stitching project that saw my Green Scrappy Strippy quilt completed and become my first finish for February!

This project, started in July last year, was obviously inspired by the Jelly Roll Race quilts. However, this quilt is more thought out – all the fabrics used were graded from light to darkest and the lightest strip is one third from the top of the quilt.
top completed
Some of the fabrics, such as the ‘red’ strip at the bottom, don’t even read as green and yet, to my eye, they said ‘green’! Perhaps next time I’d better take a photograph of the fabrics to see what the camera sees!

There are thirty-two rows of 2” strips in this quilt – and I’ve barely made a dent in my green scraps! I wonder what month will be green over on the Rainbow Scrap Challenge which is hosted by Angela at SoScrappy blog.

I quilted this about every four and a half inches apart, with two horizontal rows of quilting, about half an inch apart. I say ‘about’ because, to me, quilting is an art as well as a science and imperfections show that it is made by hand not produced by machine! You can see the quilting better from the back, which also shows my quilting ‘signature’: a pieced panel to widen the fabric to the needed width; in this case the gingham fabric was only 36” so I added a 20” panel giving 56” before trimming. (Yes, those light strips truly are green!)
green scrappy strippy back showing quiltng
Although the three layers of the quilt sandwich are well-and-truly joined, I wonder whether I should have added vertical quilting to stop the batting from doing whatever wadding does when there isn’t enough quilting. Please feel free to offer a constructive opinion!

I made eight nearly-WOF lengths into binding and should have realised I had a problem when the base of my Teflon-plated iron gripped the fabric instead of sliding over it. But no – sometimes I miss the obvious! I tried to sew the binding onto the quilt – got about a quarter of the way around (about nineteen inches) when the whole quilt slipped and instead of stitching 1/4 - 3/8 inch from the edge, I was suddenly stitching at about 1/16” for about four inches (slow down driver!)! Of course, that meant some unpicking. In the end, I decided to remove the binding completely – I just didn’t feel right about it.

The following day, not being able to find enough of another fabric to make binding, I decided to go with it. My iron stuck to it again and it smelt awful. Obviously it was a polyester blend and something that felt like plastic doesn’t belong on the bound edge of a lovely soft cotton quilt! In the end, I used three different, similarly-coloured, green fabrics that read as the same tone – look closely, you may be able to see them! (probably not!! LOL)
green scrappy strippy finished
Here’s a close up of one of the fabrics, I’m getting better with my mitred corners! It’s actually much darker than this photo shows – I like dark bindings – but the mitre wouldn’t show when I darkened the photo!
green scrappy strippy corner and binding fabric
So that’s it! My first finish for February and my second personal finish for 2015 (sixth if you count the four projects I completed in January that were other people’s starts!)

I'm also linking this post with Thank Goodness It's Finished Friday (I'm a little late) which is being co-hosted at Quokka Quilts and A Quarter Inch from the Edge (I've linked at the latter).

So, what do you think? Should I go back and add some vertical quilting? (I’m not taking the binding off!)
What would you do?

Sunday, 1 February 2015

blue, blue, blue

RSC 15
No, I’m not suffering from depression; I have three projects to talk about and they’re all blue.
The first is my blue scraps project, Crumbed Churn Dash, for the Rainbow Scrap Challenge over at SoScrappy blog.

In this post, I talked about the twenty-two 4” crumb blocks I made on 3 January.
22 crumb centres for Churn Dash

Before I could proceed, I had to choose the fabric for the churn dash motif. I had thought I would use solid black but, in my eyes, it didn’t enhance the colours in the crumb blocks, and I thought it made the blocks seem flat and lifeless. (I’ve changed my opinion now that it’s too late!)
black background

Then I thought I’d try a pale blue background, even though I was pretty sure I knew what the outcome would be!
pale background

I needed quite a large amount of a darkish fabric to make those medium blues stand out. This was the only blue I could find that served my purposes (I tried others but they really didn’t work!). 
blue background
I thought it looked good and I had an adequate amount of fabric but I just wasn’t sure… working with checks can be a problem – one needs to keep them straight to look good and there 160 units in the quilt!

I wonder what you would have chosen? I had decided to go with the solid black but was still restless – I have a philosophy that I live by: “if in doubt, don’t!” I really didn’t want to use the black but what could I do? Then I had a brain-wave!

Brown, being a shade of orange, adds some warmth to the quilt and I quite like the combination of chocolate brown and medium blue so I went with that. Of course, I wasn’t going to cut 160 pieces in case it didn’t work so I did four of each unit to begin with; enough to make one block! (The brown is actually much darker than this photo shows)
first block completed
I was hoping that I’d be able to tell you today that I had finished making all 160 sub-units for twenty churn dash blocks.

But, I was wrong.

On Friday, I finished all twenty blocks! I started the day with eight done, worked consistently all day, and finished all twenty around 4pm.
20 blocks finished
I love how the brown churn dashes make a grid for the large blue diamonds to hang off!

As you can see, it’s planned scrappiness. I spent quite a bit of time determining the placement of each piece of ‘rag’ (as my teacher calls them)! I’m looking forward to having a ‘proper’ design wall soon so I don’t have to keep working on the floor in another room.

I pressed away from the centre but I think I’ll have to go back and press all the seams joining the top and bottom rows to the centre rows of each block; in this way, I’m hoping I’ll avoid the problems of too much bulk where the blocks meet. It’s a hassle but better than the alternative!

Yesterday, WM and I discussed possibilities for basting. We have carpet throughout the house. I’ve tried basting on carpet and usually end up pinning my project to it! Besides, it’s too hard on my knees and back. Our dining table is timber so I can’t use that for fear of scratching the surface with pins. WM told me that I could use the kitchen bench/breakfast bar  so I tried it out with the Bargello table runner. The bench-top is Caesar-stone so it will be interesting to see how it stands up whilst having pins pushed against it. When I removed the table runner, the bench-top didn’t seem any worse for wear – I was very careful not to push the pins too hard! The only marks I can see are from the masking tape and I’m assuming they will wash off.

Not only did I get the table runner basted, I also got it quilted, trimmed and bound. Woo-hoo! This is the fifth finish of 2015 and the first of five of my own projects that I had waiting to baste, quilt and finish.
2014 Blue Bargello finished
There will probably be another post for this project: I wanted to say more but this post is already quite long enough!
With all those to-be-quilted projects, I need another scrap piecing project so I’m joining Sharon’s Let’s Book It challenge this month. 
Dust Off Those BooksWhile I had my blue scraps out, I started a quilt based on a pattern called “Slices” from the book Scrap Republic by Emily Cier. That quilt is only 30” square; I need to make mine 48” x 64” so there’ll be twelve triangles of most colours not the four shown here.
scrap republic 2 inspiration from Emily Cier book Scrap Republic

It’s a new project but it will take me all year to complete given that the Rainbow Scrap Challenge is one colour a month. Interestingly, Emily Cier recommends making one triangle at a time; I’m thinking it might be easier to sew a whole lot of scraps together then cut the triangles from the resulting fabric. Of course, doing it Ms Cier’s way means that every scrap is followed by a different scrap; doing it my way, while possibly faster and with less wastage, will result in the same scrap combination over and over. I’ll have to think on it some more. Here is the first ‘triangle’ I made. I’m not cutting the triangle properly until I have all the triangles for a row – bias edges are tricky things!
first blue triangle
If you’ve got a few minutes, why not drop into Angela’s blog to see what people have been doing with their blue scraps; and/or Sharon’s blog to see what projects people are making from the long neglected patterns in the books on their shelves?

Also, I’ve now edited my previous post and linked it to JulieK’s Binding Blitz link-up. Please check out that link too; and if you’ve bound a quilt this month, add yours to the party! You know what they say, ‘the more the merrier’!

Time for pink – the colour of February… stay tuned! ;-)