Showing posts sorted by relevance for query first of spring. Sort by date Show all posts

Thursday, 1 September 2011

first day of spring

In Australia, the first day of any season occurs on the first of the month.

Today is officially the first day of spring.

A couple of weeks ago, I showed you photos from our garden. The wonga wonga vine, an Australian native, was in bud.

Many of those buds are now flowers and the vine looks like this (I don't know why the plant on the right is flowering better than the plant on the left.


According to the Macquarie dictionary,"wonga wonga" is of Aboriginal origin but I have not been able to trace its meaning!

However, according to MacMillan dictionary (and others), "wonga" is (or was) an English slang term for money!
However this plant got its name, I hope you've enjoyed the pictures of the flowers!

Monday, 31 October 2011

wheat bags - a tutorial of sorts

On 12th November, Caring Hearts Community Quilting group will have a stall at the Spring Fair in the village of Glenbrook (in the Blue Mountains, west of Sydney).

DD and I are preparing items for sale. Our first thoughts were place-mats, coasters and wheat bags.

DD was most excited about the latter so that's where we started.

We viewed a few tutorials on the 'Net but then made our bags to suit the size we wanted and the fabric we had. We decided to make removable covers (after testing one with the outer cover and inner cover made in one piece).

So here is a tutorial (of sorts). I have written it primarily for us so that we can remember what we did next time we want to make some!
  1. Decide what size you want your wheat bag to be. This could be determined by how much you have of your chosen fabric. Use only natural fibres; synthetic fibres and microwaves don't mix - synthetic fibres also tend to sweat, leaving a wet patch in your bed if you use it as a bed warmer - something your guests may not appreciate! LOL)
  2.  Cut two pieces of your chosen fabric, half inch wider than your finished width. The first piece should be one inch longer than your desired finished length; the other piece should be 4 inches longer than your desired length (to fold over the end and keep the wheat bag inside).
  3. Cut one piece of unbleached (prewashed) calico twice your finished width plus 1/2 inch. The length of this piece of calico should be 1/2 inch longer than your desired length.
  4. Fold the shorter edge of your unbleached calico down 1/4 inch and press. Stitch this down to hold it in place.
  5. Fold the calico in half lengthwise, right sides together, and sew a 1/4 inch seam across the short end (opposite your folded end), pivot at the corner, and sew 1/4 inch seam along the length.
  6. Now sew the seam again, this time a scant 1/4 inch. This will reinforce the seam and keep the wheat seeds in place.
  7. Turn the bag right side out. Don't fuss too much with the corners -- the wheat will sort them out for you!
  8. Fill the calico sack with clean feed (hard) wheat, then carefully stitch the opening closed (if your needle hits the hard wheat seeds it might break - so be very careful). I think this is the most complicated part! If you have an extension table for your machine use it -- otherwise the weight of the wheat in a bag lower than your needle plate will make sewing very difficult!
 How much seed is up to you. We used approximately 900g for an 18" x 6" wheat bag.
Now to make the outer bag in your decorative fabric.
  1. Fold one short end of each piece over to the wrong side 1/4 inch, then fold it over 1/4 inch again, press and stitch down (separately please!). This will give a neat edge to your finished bag.
  2. Place the longer piece of fabric right side up. Place the shorter piece (face down) on top, matching the bottom (unhemmed) ends. Fold the longer side over the top so that it is the same length as the shorter piece: that is the hemmed end of the shorter piece is between two layers of the longer fabric (look at a pillow case if this doesn't make sense to you!!)
  3. Stitch a 1/4 inch seam along the length from the folded end to the bottom, pivot at the corner, seam along the bottom, pivot again, and seam along the other long side. I always start with a few reverse or lock stitches and finish the same way.
  4. Turn your bag right side out. Trim the corners across the diagonal if you want to (we don't!).
  5. Press so that the seams are flat and everything is neat.
  6. Insert the filled calico bag into the decorative cover. Try to match the bottom corners of the two bags inside each other.
  7. Turn the whole lot upside down and match the two corners of both bags under the flap you have created on the decorative bag.
  8. Ease everything into place.
our first four finished bags
  1. Write or print the following instructions onto a tag:
    Microwave 1-2 minutes. Do not overheat.
  2. Attach the tag using a ribbon or pretty raffia.
You could fill one third of the calico bag, seam across it, fill another third, seam across it and fill the rest of the bag but we prefer not to do that. This makes the bag more rigid and we prefer to have the bag more flexible than that.

If you find any errors or have a question, feel free to email me.

If you make some bags using this tutorial, please let us see how they turned out.

Thursday, 31 July 2008

And more meme-ness!

This one appropriated from Paisley Womble

What's my name?

YOUR ROCK STAR NAME: (first pet & current car)
Thomasina Elantra [we thought the cat was a boy!]
YOUR GANGSTA NAME: (fave ice cream flavor, favorite cookie)
Double Chocolate Chip TimTam
YOUR "FLY Guy/Girl" NAME: (first initial of first name, first three letters of your last name) L-Fra
YOUR DETECTIVE NAME: (favorite color, favorite animal) Purple Labrador
YOUR SOAP OPERA NAME: (middle name, city where you were born) Marie Sydney
YOUR STAR WARS NAME: (the first 3 letters of your last name, first 2 letters of your first) Fraly
SUPERHERO NAME: ("The" + 2nd favorite color, favorite drink) The Red Tea
NASCAR NAME: (the first names of your grandfathers) Alfred Francis
STRIPPER NAME: ( the name of your favorite perfume/cologne/scent, favorite candy) Onna Lindt
WITNESS PROTECTION NAME: (mother's & father's middle names ) Theresa Francis
TV WEATHER ANCHOR NAME: (Your 5th grade teacher's last name, a major city that starts with the same letter) Kawolski Kansas
SPY NAME/BOND GIRL: (your favorite season/holiday, flower) Spring Rose
CARTOON NAME: (favorite fruit, article of clothing you're wearing right now + "ie" or "y")Cherry Nightie
HIPPY NAME: (What you ate for breakfast, your favorite tree) Komplete Jacaranda
YOUR ROCKSTAR TOUR NAME: ("The" + Your fave hobby/craft, fave weather element + "Tour") The Knitting Sunshine Tour

Sunday, 25 August 2013

What would you do?

We have had a very mild winter and spring has begun early. Although we are officially still in the coldest month of the year (there was snow on the nearby mountains a couple of days ago), yesterday was warm, clear and bright -- not a cloud in the sky in the morning and only small puffs of white in the afternoon. A perfect day to be outside.

So where did WM and I choose to spend the day?

In my sewing room, where else?

Now, please don’t be shocked. You are going to see something that is quite awful. I’ll admit that I am a hoarder, a procrastinator and a bit lazy. But I’m working on improving in all those areas!

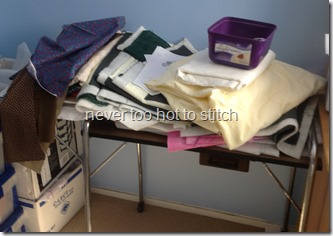
My sewing room was a bit of a mess. I really didn’t feel creative in there at all! Any horizontal surface, like my cutting table, my sewing table and the spare machine table that DD occasionally used, had become cluttered. The cutting table had mostly knitting projects from last weekend or those in progress but there’s also a finished quilt under all that. My sewing table has a pile of pre-washed but not ironed fabric on it plus a few other odds and ends. The old machine table had become the storage place for works in progress and more prewashed but unironed fabric, this time flannelette.

cutting table 2 cutting table 

sewing table machine table

To begin the clean up, I moved everything that wasn’t furniture but was on the floor from the sewing room to the family room:

family room - beginning 2 family room - beginning

Yes, all those boxes, bags and tubs (and a pile of batting scraps moved from a container because I needed it for something else) were on the floor of my sewing room, making it hard to get at anything else. Don't worry, it's all ordered so I know where it's going! That lounge with the two tubs in front of it is covered in quilting related things and everything there will be going back into the sewing room. The lounge with the two green shopping bags on it has knitting related stuff and everything there will be moved to the wardrobe in the spare bedroom.

The wardrobe in the sewing room had been a repository of all sorts of things. The room had been DD’s bedroom so there were still some clothes of hers plus at least one box of her things. The rest was either quilting related (fabric) or stuff I had packed in boxes for our renovation in 2007 and had not unpacked yet!

inside the wardrobe 2 

Encouraged by WM, I threw out some unneeded, long accumulated items. This is very hard for a hoarder who saves everything because I might be needed in the future. I emptied four of the five archive boxes (the other was DD’s) and the large white carton carton and WM re-packed what was left into one carton (to be rehoused at a later date)!

WM visited the local Reject Shop (a discount store) while I, supposedly, moved things back into my sewing room. Unlike others who enjoy this part of the process, I don't -- I find it very hard to work out where I want everything. Especially when we started on the task before I had thought it all through!

WM returned with four storage units -- five plastic drawers in each. Here are three of them:

 new drawers

At first we arranged three of them in the wardrobe like this, but then we moved the old ones into the wardrobe and put the new ones on display because they are all charcoal (the only colour they had), and the original two units, now hiding inside the wardrobe, are blue.

I like the uncluttered look that we have achieved so far but the family room now looks like a disaster zone!

There's still a way to go. Lots of ironing and folding of all that pre-washed fabrics to be done too.

However, the thing that is really holding me up concerns a lot of fabric that is not actually mine.

As many of you would know, I belong to an organisation that makes quilts for children in hospital and for palliative care patients. We make these mostly from donated fabric. Because we have minimal storage space in the Council-owned room where we meet, different members are storing the donated fabric at their homes. I am one of those. At the moment, some of the fabric at my place is stored in a large plastic tub which is crammed so full of pieces of fabric that I have no idea what's in the tub and so am not using it to his full potential. That tub, the larger of the two in the photograph below, has been in my home for fifteen months now, and no-one, not even the lady who packed it, has any idea what's in it!
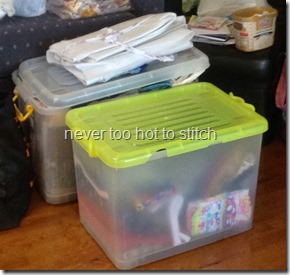
family room - beginning

The big question is this: should I leave it all in the tub so that, in the unlikely event of our founder requiring it at a meeting, it will be packed and ready to go? Or should I unpack it and have much greater access to the fabric? If I do the latter, I lose space but gain precious time because I won't have to rummage around the overstuffed tub on the off-chance something inside might be just what I need. I may even become inspired when I see all those new fabrics to play with! ;-)

I'm inclined to unpack it -- but what would you do?

Tuesday, 6 October 2009

Beanies part 2

I was tired of the harsh lustrous acrylic I had been using for children's jumpers [sweaters]. Australian Country Spinners market it as baby yarn - eek! It won't be knitted by me for any of my grandchildren. It looks so pretty but it's so harsh to knit with because of that strand of lustrous acrylic. So, what better place to put harsh yarn than on the head but away from the skin. This pretty-to-look-at yarn cried out to be a beret. I love the look of berets but I wouldn't think they are very practical as a head-warmer! Nevertheless, I couldn't resist so a beret it had to be! It's the right size around my head but the top is a little large. It's probably not really appropriate for charity knitting either but I'm sure it will fit someone. I love the look of berets but I don't have the confidence to wear a hat as an accessory. I think it takes a certain kind of personality to pull it off and I'm not one of them - I'd be utterly self-conscious!


Somehow I have missed showing photos of two beanies I knitted in winter: the first has a self developed slip stitch pattern and the second is the end [hurrah] of that yarn I bought on special and never want to knit with again! Fortunately, it's no longer made so I won't be tempted to buy it because it's cheap!!


There were some more beanies knitted in August. All of them were knitted from Moda Vera "Spell" which is a acrylic/wool [75%/25%] blend. There were four of them but one photo is sufficient. One had a moss [seed] stitch band, the others are rib - one K1P1, the other two K2P2.


I liked these beanies but I felt the yarn wasn't shown to advantage so, in September, I cast on three times for an entrelac beanie because I thought the colours of the yarn would show up better. I was right but the first beanie was way too big - enormous in fact, and the second I decreased two quickly so that it was the right diameter but too short in the cap! The third one still didn't work so they were all frogged and a different design created. This one involved eight triangular shaped panels. Each panel was knitted then stitches picked up along the edges and the next triangle begun [an entrelac technique modified].


I like the twisted stitches between each triangular shaped panel. There is another similar beanie on the needles having its spring vacation in my drawer at work becasue I forogot my kntting in my eagerness to get out of there [and start my two week break].

Monday, 19 October 2009

of this and that and unravelling the mystery

warning - long photo-free post

Do you like my new-look blog? I found the sidebar made the place looked so untidy - it was almost depressing! And what better time for a bit of spring cleaning than the middle of spring? LOL

Last week, knowing that I had to return to both jobs this week [usually terms begin a week apart] I should have been preparing lessons. But what was I doing? Of course I was. A blog doesn't change by itself. First I had to find out how to make that table-link-thingy at the top there, then I had to write a whole lot of new posts and link them and then... well, I won't bore you with the whole pseudo-geeky story! Suffice to say I'm pretty happy with the new, uncluttered web-home!

Purple is my favourite colour but I'm thinking I might change the background to cream. Hmmm! I'll have think on it some more.

And, by the way, my lessons are all prepared! All sixteen hours of them - I may even have enough to take me into next week!

And the sock workshop? Well, we had about twenty attendees [I didn't actually count them]. We had some people knitting on 4 dpns, some on 5 dpns, some on two circulars and some on one - a challenge that was, I'm happy to say, successfully met due to the capable assistance of my friend D [who could knit and graft socks in her sleep] and the goodwill of the participants in helping each other.

Everyone seemed thrilled to have learnt a new cast-on [I know it as invisible cast on]. And those that mastered grafting were doubly pleased! And yes, most of the participants did finish the whole sock at the workshop.

Would I do it again? In a heartbeat! I love teaching/tutoring/facilitating and when it's related to my favourite hobby - what could be better?

"But what about the title of this post?", I hear you ask! Well folks, this may not come as a surprise to some, but back in June [on WM's birthday to be exact] I succumbed. I said I wouldn't but I finally caved in. Not because I didn't think it was a wonderful place - I knew it was. David Reidy [Sticks and String podcast] never stopped talking about when he got his invitation. He coerced, he cajoled, and still I stood my ground! It was me I didn't trust - too much time on the computer already, didn't need any new distractions!

But I gave in [I said that already, didn't I?] All because Kris - the Web Goddess - was coming to our Guild group to talk about the knitternet. We were asked to do it before she came and I finally caved in!

Oh, come on - read the title again! You can find me there as never2hot2knit but I warn you, I'm not there often! Too many distractions, too little time! *tee hee*

Friday, 28 August 2015

still here, still stitching

I’m sure you quilters know that moment when you lose the love for a project. It’s when the end is almost within sight but there are still some hours to be put in. Well, at least that’s how it is for me.

Actually, I don’t feel like that very often – perhaps because my quilting is usually fairly straight-forward although, as you may have noticed, I am becoming more adventurous.

I still quilt the “old way” – I knot the strands on the back of the quilt and hide the ends in the wadding. My good friend, Cindy, who blogs at Delighted Hands, suggested I try taking small stitches at the beginning and end of each line of quilting and then cutting the threads. Well, I tried that method – I really did. I even tried it in class. My teacher and I discussed it and we tried three different methods but the stitching just pulled out! So I went back to the old way.

Now that is usually not too bad but this time I set myself a real challenge. My Wonky Quarter Log Cabin quilt is made up of twenty 12” blocks. I decided to accentuate the wonkiness by echo quilting around each block. That wasn't too bad – mostly I just had one pair of ends to sew in for each of the twenty blocks.

It took a while to decide on a way to quilt the blocks themselves and finally I settled on radiating lines, carefully avoiding the diagonal through the centre of the block so as not to draw attention to the fact that different width strings don't meet at the diagonal. I chose to do three radiating lines either side of the diagonal – that’s six lines for each block or twelve ends to be sewn in – for twenty blocks.
finished quilt detail finished quilt detail 2

The first two blocks took three hours to mark up and sew, and that didn’t include sewing the ends in. I still struggle to move a twin size quilt under my machine even though my machine has a 9” harp space. The weight of the quilt drags and catches and I am still learning how best to handle the quilt for the more intricate types of walking foot quilting I do (yes, walking foot – I don’t have a good grip on FMQ and am nowhere near ready to use it on my quilts).

I did get faster with each block but I still estimate that I spent about thirty hours quilting this project and sewing all those ends in. When I thought I was almost done and realised I was only 40% of the way through, having completed only eight blocks, I lost the love.

But, I am the kind of person who likes to finish what I start and today I sewed the label on that baby!

And, guess what? I found the love again. I really, really like the quilting; especially the way I’ve extended the radiating lines into the top and left side border – a stroke of inspiration.
finished quilt from front
As usual, the back includes my signature panel made up of “left over blocks” (I actually had to make the blocks for the back as DD and OG had only made nineteen of the twenty blocks needed for the front – see this post for the full story).
finished quilt from back
I’m linking this post with Thank Goodness It’s Finished Friday which is being hosted at My Quilt Infatuation. Why not pop over there and see what other people have finished this week? Perhaps you also have something to contribute.

I’m hoping to be back soon to show you a couple of mum’s completed blankets but spring is just three days away and it’s very tempting to be out in the garden!

Until then, may your stitches bring you much joy.
Lynne

Thursday, 2 May 2013

2013: The Year of the Finished Project – May edition

Never Too Hot to Stitch!
Here I am; a little bit late given that it’s already evening here in eastern Australia but it’s still the first Thursday in May – so really, I’m right on time! Open-mouthed smile

How did you go in April? What are your plans for May?

The work at the “renovator’s delight” (DD’s former home) is slowly being done, and soon I hope to have more time to get more done on my crafting projects.

WM and I are going away for our annual vacation on 25 May Airplane, plus we are taking a weekend off to travel 538km (335 miles) to my mum’s for Mother’s Day (the second Sunday in May) Red rose so this will be a short month for me in many ways! However, the travel may give me a little more hand-stitching time!

But first, let’s have a look at how I went in April.

This was the month where DD and family moved away Broken heart and I lost my desire to craft, instead I lost myself in reading fiction for a few weeks! Then I got sick with an upper respiratory tract infection! Thumbs down

WM and I have also spent much of our free time at DD’s former home working to turn it from a “renovator’s delight” to rentable accommodation, however we took a day off to celebrate my birthday in style. Therefore April, like February and March, is not looking too good. Perhaps I’d better only have one project a month in future! LOL

This is my April list:
  1. Earth and Sky quilt – finish
    It's nearly finished; it just needs the binding done. Of course that means pressing the fabric, cutting and joining the binding before I can attach it to the quilt!
  2. Scrappy Log Cabin quilt – at this stage, an unfinished flimsy
    This project remains untouched as yet, I really can’t decide what to do about the border. I think I’ll leave this for another post and maybe seek some advice!
  3. Scrappy Strings II quilt – finished 11 April 2013; you can read the post about this quilt here
  4. at least one quilt for Gift of Hope
    This one didn’t get very far: I joined four blocks (made by someone else) into a flimsy and that’s as far as I got. But there is a reason – the Big Box Store had no white or cream flannelette (for wadding) when I went there so I was stalled until I could get some. That happened on Monday this week but I haven’t had a chance to work on it since then.
  5. Westall cardigan – WIP – finish ribbing, knit sleeves
    I finally finished the ribbing on 5 April but just haven’t been in the mood for the concentration needed to pick up stitches around each armhole to commence the sleeves!  Instead I broke my own rules and started a new knitting project – but that’s a whole other post!
  6. hexagon project bag – WIP – my “slow stitching” project
    I have done a little work on this project. WM and I worked both days of last weekend at DD’s house and we were extremely tired; too tired in fact for me to lift my sewing machine in and out of the car so I took this project to class on Monday – and now I find it hard to put it down!
2013-05-02 progress
Sorry about the shadow over the photo - I had to take it at night under fluorescent light, using my iPad -- but at least you can see there has been some change since this post. And yes, it does curve up like that -- it will be a bag so it needs shaping! See those yellow star pieces: pentagons, not hexagons -- that's where the bag gets it's shape. What you're looking at now is the base of a drawstring bag turned inside out!

So, what do I plan for May? Well firstly, ease up and take some pressure off myself! The list is the same length (six items) but the goals are not so ambitious!
  1. Blanket for Emily
    I had hoped to get this finished in time to deliver it in person when we see her for the first time on 10 May but there’s no way I could do it! I estimated that if I knitted for six hours every day until 9 May it would get done – but I don’t have that kind of knitting time, nor do my hands like knitting with cotton for long periods of time! So Emily will have to patient! (That’s a big ask for someone who’s just nine days old! LOL)
  2. Westall cardigan – WIP – sleeves?
    This should be my #1 priority this month, it’s been hanging around for too long. It’s a cotton/acrylic blend so if I don’t get it done soon I’ll have to wait until spring to wear it. But Emily’s blanket somehow seems more important!
  3. Earth and Sky quilt – finish including label!
  4. Scrappy Log Cabin quilt – finish the flimsy!
  5. hexagon project bag – again, my “slow stitching” project for the month.
    This project will go with me on my travels so hopefully the end of June will see it done!
  6. Gift of Hope quilt #2: Now that I have the flannelette there can be no more excuses! 
Nothing But UFOs in 2013
Projects 3, 4 and 6 are my goals to be included in Nothing But UFOs in 2013 (although we all know that I will work on things that are not UFOs, right?) which is hosted by Carrie over at A Passion for Appliqué.
    So, how about you?

    Write a blog post detailing your progress (or not) in April and your plans for May. You can be working in any craft – please don’t feel it has to be quilting, knitting or hand-piecing; they are just the crafts on my list at the moment (later there could be cross-stitching, embroidery or even crochet!) .

    You can make your own rules or follow mine, it doesn’t matter: what is important is getting those UFOs out of the pile/closet/basket and getting them finished!

    You don’t even have to have a blog to join in – post your photos to Facebook or Flickr or Picassa or Pinterest – wherever. Just come back here and link up so we can visit and see what you’ve been up to and what your plans are!

    Good luck with deceasing the number of UFOs/WIPs at your place during May.
    ~~~~~~~~~~~~~~~~~~~~~~~~~~~~~~~~~~~~~

    Sunday, 13 September 2009

    day out

    Yesterday I Had a lovely day out with my DD. We met at Strathfield station in the mid-morning and caught a train to Newtown for a day of culture and fun [and a little shopping].

    At Newtown station we turned left into King Street and walked for what seemed like miles [but was probably a kilometre] before crossing over and walking back up the other side of the road. We had looked in the windows of a few shops but our first real stop was The Fiji Market [591 King St] which we had first visited on a Gourmet Safari tour. We loved the smell of the Indian spices and the feel and colour of the silk in the saris. But, pretty soon, all the aromas became overpowering to The Pregnant One and it was time to move on.

    And so continued our slow ramble up King Street before a stop for lunch at Arabella Lebanese restaurant. The food [hommous, tabouli, fatoush and majadra] was some of the best Lebanese we've ever tasted and the serving sizes were more than adequate! We had to wonder why we were the only ones in the restaurant at lunch time!

    Then came a visit to an ever-interesting shop: All Buttons Great and Small. We spent ages inside, ooh-ing and ah-ing over the cuteness/beauty/wonder of the buttons before continuing our ramble northwards, in and out of boutiques, second hand clothes shops, and shops selling artifacts from all over the world. After a long walk for The Pregnant One [henceforth known as TPO] we finally arrived at 47 King St - the supposed highlight of my day! Can anyone tell me what happened to Champion Textiles? Have they moved or gone for good? How disappointing, especially for TPO. It was a long walk in the spring sunshine with a full belly from that delicious lunch [at 489 King St]. And it seemed, for her, a long walk back to the station.

    The day drew to a close with a cool drink at the Bank Hotel conveniently located quite near the station [our ultimate destination] and some comfortable lounge chairs a mere ice-throw from the ladies' conveniences! For non-drinkers, I don't think we've ever visited so many pubs [well, the ladies' rooms anyway!] in one day - luckily, pubs are abundant in King St.

    We had visited Fiji, India, USA, UK, Africa, Lebanon, Himalayas, Turkey, Afghanistan, Thailand, China and Japan during our travels and never left King St! What a fabulous place - I encourage everyone who visits Sysney and is interested in cultures from around the world to visit Newtown at least once. And spending the day with my DD was the best treat of all!

    But what happened to Champion Textiles?

    Sunday, 27 November 2011

    Scrappy Strings II

    DD and I have been practising using the quilting frame with two layers of calico. Rather than "waste" more calico, we continued on the calico we had already used for practice! Here is a sample of my freehand stippling in red thread (the purple is the old practice) working from right to left.


    Here is a sample of DD's freehand work - pretty good, don't you think?


    Thanks to a hint from Cindy of Tops to Treasures, I bought three metres of beautiful blue polar fleece to use instead of batting but it is so pretty we can't bring ourselves to use it! Being the end of spring, the Big Box Craft Store has very little polar fleece in stock - they need the space for summer fabrics.

    So, DD and I decided what we needed to do was to make a quick and easy quilt top, then get some batting and practice on a "real"quilt.

    To that end, we began making string blocks. Each is 9 3/4 inches square, and made up of six or seven strips. Here are the first five (of 24) that we have completed. Since I took these photos, four more blocks have been finished.I spent several hours, cutting and pressing strips and matching them into pairs. This pile doesn't look like much but it consists of 80 pairs of matched strings, plus some strings that have been sewn into pairs and are now pairs waiting to be joined to pairs.

    This pile was all sewn togehter on Tuesday. DD and I worked together, I cut and press, and DD chain pieced - the production line keeps us both happy and is quick and efficient.
    Hopefully it won't be long before we have a quilt top to work on!

    (And hopefully by the time you read this I am on my way home from mum's).

    Wednesday, 24 September 2008

    Southern Hemisphere "Spring Fever"

    I finished knitting a "Tomtem" jacket from Elizabeth Zimmerman's Knitting Without Tears months ago but I was never brave enough to insert the zipper. It all seemed way too hard. However, at the beginning of September I must have caught spring fever; I finished a few projects that had been hanging around. Inserting the zip was pretty easy really, once I got my needle through the thick end of the zipper tape.

    Anyhow, here it is - my very first completed Tomten.
    [I know there's been one in my FO list all year but it got there by mistake - it still has no zipper! I've removed it from my FO list!]

    I also finished the striped blanket and a baby cardigan which had also been hanging around for weeks [no photos; it was given away without any being taken]. Now there's just the matter of the summer cardigan to finish and SSS [for two pairs] to overcome! It's those tiny 2.75mm needles that put me off! LOL

    Then there'll only be recently cast-on projects in progress: a cotton baby blanket for my neighbour who is expecting her first child in February and another blanket for Wrap with Love, this time made of 28 crocheted 10inch squares. Crochet is so fast compared to knitting! But don't worry, I haven't given up knitting; I'm just taking a short detour while I decide what to cast on next! I desperately want to knit lace but what and for whom? Nobody I know is a lace person and it's not the most practical style for charity knitting. Ah! Decisions, decisions!

    Friday, 30 November 2012

    more finishes

    I have not been so productive over the last couple of weeks – life gets in the way of crafting sometimes! And then there are times where I just don’t feel like sewing. I usually knit because I can do that with my eyes closed and find it very relaxing.

    Anyway, I have finished two things – one sewing, one knitting.

    The first is the angel I made from a pattern and fabric given to me at our quilting group. I mistakenly thought they were for a secret Santa project but they are actually to sell when we have our Airing of the Quilts in April (our annual fund-raiser).
    2012 Christmas Angel finished
    The angel was made on the machine but joined together by hand. 

    There is running stitch around the sleeves, wings and dress as well as the banner.

    The face is drawn on using a Sharpie with a fine point.

    The rosy cheeks are coloured pencil.

    The hair is some dark brown 5ply (sport) yarn that I had in my “scraps”.

    I didn’t have any gold thread for a hanger so I crocheted a chain using 6 strands of embroidery cotton and a 2mm hook!


     My knitting finish is a baby blanket for our latest great-nephew (we have eleven great nieces and nephews; MIL has seventeen grandchildren and thirteen great-grandchildren).
    2012 Blanket for Eamon2012 Blanket for Eamon detail

    The pattern is Bernat Baby Blanket; it is knitted in Belle Baby “Buttercup” (4ply/fingering, 75% bamboo, 25%  acrylic) on 4.00mm (US 6) needles. I used 6.66 x 50g balls to make a blanket that is 106cm x 112cm (41.5”x44”). The yarn is machine washable and can be line-dried, something young mothers seem to prefer to hand-washing and drying flat; I wonder why? LOL

    My November to-do list looks like this:
    1. Christmas Angel – finished
    2. Cloth book – finished
    3. Christmas Tree embroidery – to be worked on today
    4. Baby  Blanket – finished
    5. Very Hungry Caterpillar Quilt – more work on the quilting will be done today; this project will definitely not be finished this month!
    6. Intarsia Blanket – finished
    7. scrappy blocks – 16 blocks made; hopefully there will be more done today
    Not bad after all!

    The weather is going to test my motto (“never too hot to stitch”) today – it is the last day of spring and the forecast maximum is 40°C (104°F)!

    Saturday, 2 April 2011

    autumn in his garden

    I used to garden; I think I quite enjoyed it. But gradually, WM took over and now the gardens are his domain. The backyard is anything but child friendly, containing no lawn and a lovely fishpond. The rest is garden or paths or paving or swimming pool or shed.

    Lest that sound awful, his garden is quite pretty. And as the first month of autumn draws to a close, there are signs that the season is changing.

    We have a temperate climate, so autumn leaf colour is not spectacular. The weeping cherry tree merely turns brown and sheds its leaves covering the struggling black mondo grass.

    The Senkaku maple is just beginning to turn.

    This photo was taken a couple of hours after these poor camelias took a battering in Wednesday afternoon's thunderstorm...

    ....as did the miniature roses. I think this one is called "Blizzard".
    The Japanese anenomes are taking over the area outside my study window - there are dozens of flowers and hundreds of buds.


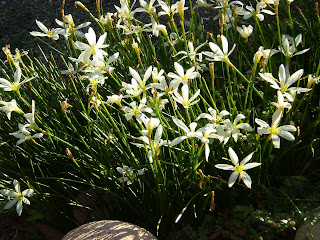
    There are drifts of these crocuses all over the yard. I love the sunlight shining through this patch near the fishpond.
    This poor azalea is confused - it thinks it's spring already! (WM better look carefully at those leaves - they don't look well.)

    Out the front, the garden is planted in Australian natives. The fan flower is about the size of my thumbnail.

    This is the flower of a smallish shrub called melaleuca thymifolia. It may be called that because it has very small leaves like the herb; it certainly doesn't smell like thyme.
    And finally, a newly emerged kangaroo paw with the afternoon sun shining through it.
    Garden by him; photos by me.